Getting started with Intel Galileo is almost like getting started with Arduino. But with a few twists.
I recently got my hands on an Intel Galileo. But it took me quite some time to get it up and running.
So I decided to write a small guide to show you exactly how I got started with my Intel Galileo.
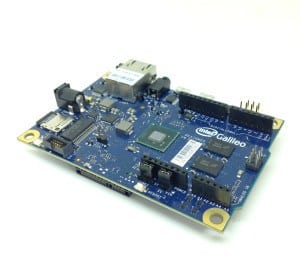
What is Intel Galileo?
It’s an Arduino-like board with an Intel processor. That means you can use it as an Arduino, but you can also do a lot more stuff with it.
Click here if you’re not sure what an Arduino is.
In the beginning, I was struggling to see what the big deal was with this Intel Galileo. It seemed like a standard Arduino, just with a lot more processing power.
But after looking more into it I’m realizing that the cool thing is that you can run Linux on the board. And you can interact with Linux from your Arduino sketch.
For example, you can use an Arduino sketch to read sensor data and save it to a file.

10 Simple Steps to Learn Electronics
Electronics is easy when you know what to focus on and what to ignore. Learn what "the basics" really is and how to learn it fast.
Then you can easily get a web server up and running in Linux just with a few lines of code. And display the data from the sensors on a web page.
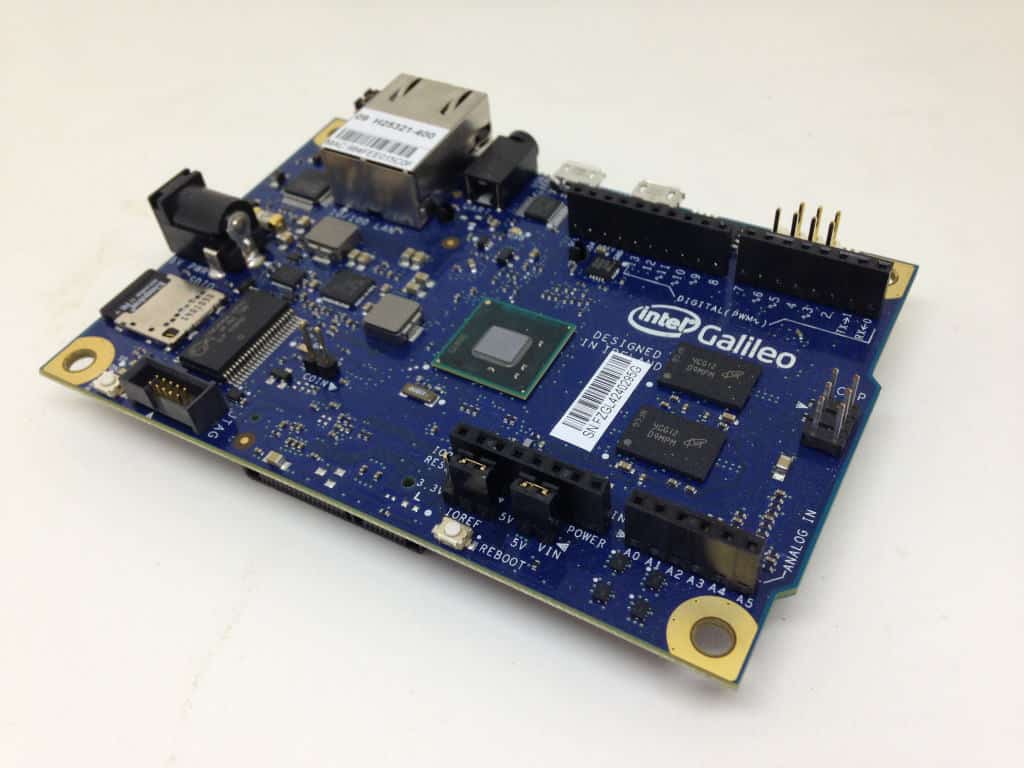
Unboxing and Testing the Intel Galileo

A slightly annoying thing was that there was no USB cable in the box to connect the Intel Galileo to my computer. But luckily I had one from another project.
I connected the power source to the board and waited until the USB LED on the board was lit. Then I connected the USB cable to my computer.
It took a while, but after maybe a minute or so, a virtual serial port appeared on my computer.
Linux:
It seems like you need the Intel Arduino Galileo IDE to use the board on Linux.
So I installed that.
Windows:
For Windows machines, you can use the latest Arduino version.
And install drivers from here: https://downloadcenter.intel.com/download/24748/Intel-Galileo-Firmware-and-Drivers-1-0-4
It’s not Working!
Next, I uploaded the following “Hello World”-sketch to my Galileo:
void setup() {
  // initialize serial communication at 9600 bits per second
  Serial.begin(9600);
  // sending characters on serial port (visible if you display the serial monitor)
  Serial.println("Setup says: Hello World!");
}

void loop() {
  //sending characters the same way as setup function
  Serial.println("Loop says: Hello World!");
  //waiting a second
  delay(1000);
}
There were no errors while compiling and uploading. But I was not getting the “Hello World” I was supposed to on my Serial Monitor. Instead I got **B0100000063f694 �
Hmmm…
Updating the Intel Galileo Firmware
“There’s no way they would ship a board with a firmware that doesn’t work”, I told myself.
But after a lot of frustration, I thought decided it was worth a try to update the firmware of the Intel Galileo to the latest version.
So I went to this site to download the firmware updater:
https://downloadcenter.intel.com/download/24748/Intel-Galileo-Firmware-and-Drivers-1-0-4
Firmware Uploader on Linux Not Working
I tried the Linux version first.
It started and just got stuck at a few percent for 30 minutes and I read online that the board had a known issue with timing out and the only solution presented was to try again.
So I tried again, still the same result.
Updating Firmware Using Windows
I decided to give it a go in Windows 7 instead.
The firmware uploader was uploading, then after about 5 minutes, I got a message that the board had timed out.
I restarted the board and started the firmware uploader again. But this time it was telling me that it had the latest firmware 1.0.4 — so apparently, the previous attempt had worked!
I tried uploading the “hello world”-sketch again — and it worked! Success!
The Summary
After playing around with the Galileo a bit, I’m seeing that the mini PCI express port is really interesting. With this, you can connect parts designed for a laptop such as a wifi card.
And – last but not least, it has both a debug port and ethernet connection. This was really useful for me when debugging a Radar library for Arduino that I’m developing.
The radar was using the UART on my Arduino, so I didn’t have any way of getting debug output. But with the Galileo, I could plug it into my router and get info through the LAN connection.
To get started with Intel Galileo, you need to:
- You need to update the firmware of the board to the latest version.
- You need to have the latest version of Arduino IDE installed, or the Intel Arduino Galileo IDE
- You need to connect the power to the board and wait until the USB LED turns ON before connecting the USB cable to your computer.
Check out the following Intel Galileo tutorials:
- How to measure rain and soil moisture with your Intel Galileo Board
- Create a color-changing lamp with Intel Galileo
- How to build a simple weather station
- How to boot Intel Galileo from SD-card
- How to build your own DIY weather station

Get Our Basic Electronic Components Guide
Learn how the basic electronic components work so that circuit diagrams will start making sense to you.
THANK-YOU!
We faced the B0100000063f694 error too and we became crazy trying to update it with linux update tool.
With windows 10 everything works now!!