If you’re new to the BeagleBone, it can seem complex to get started. I’ve put together this BeagleBone Black getting started guide to help you over the first hurdle.
And as you’ll see, it’s really not that hard.
Confused? Check out What Is BeagleBone?
My intention with the BeagleBone Black now is to use it to develop electronics for a coffee-related project. With the BeagleBone, I can add a beautiful touch screen to the project, because it has HDMI output.
I have only barely tried the BeagleBone before, and that was a few years ago. So I’m writing this guide with a beginner’s mindset.
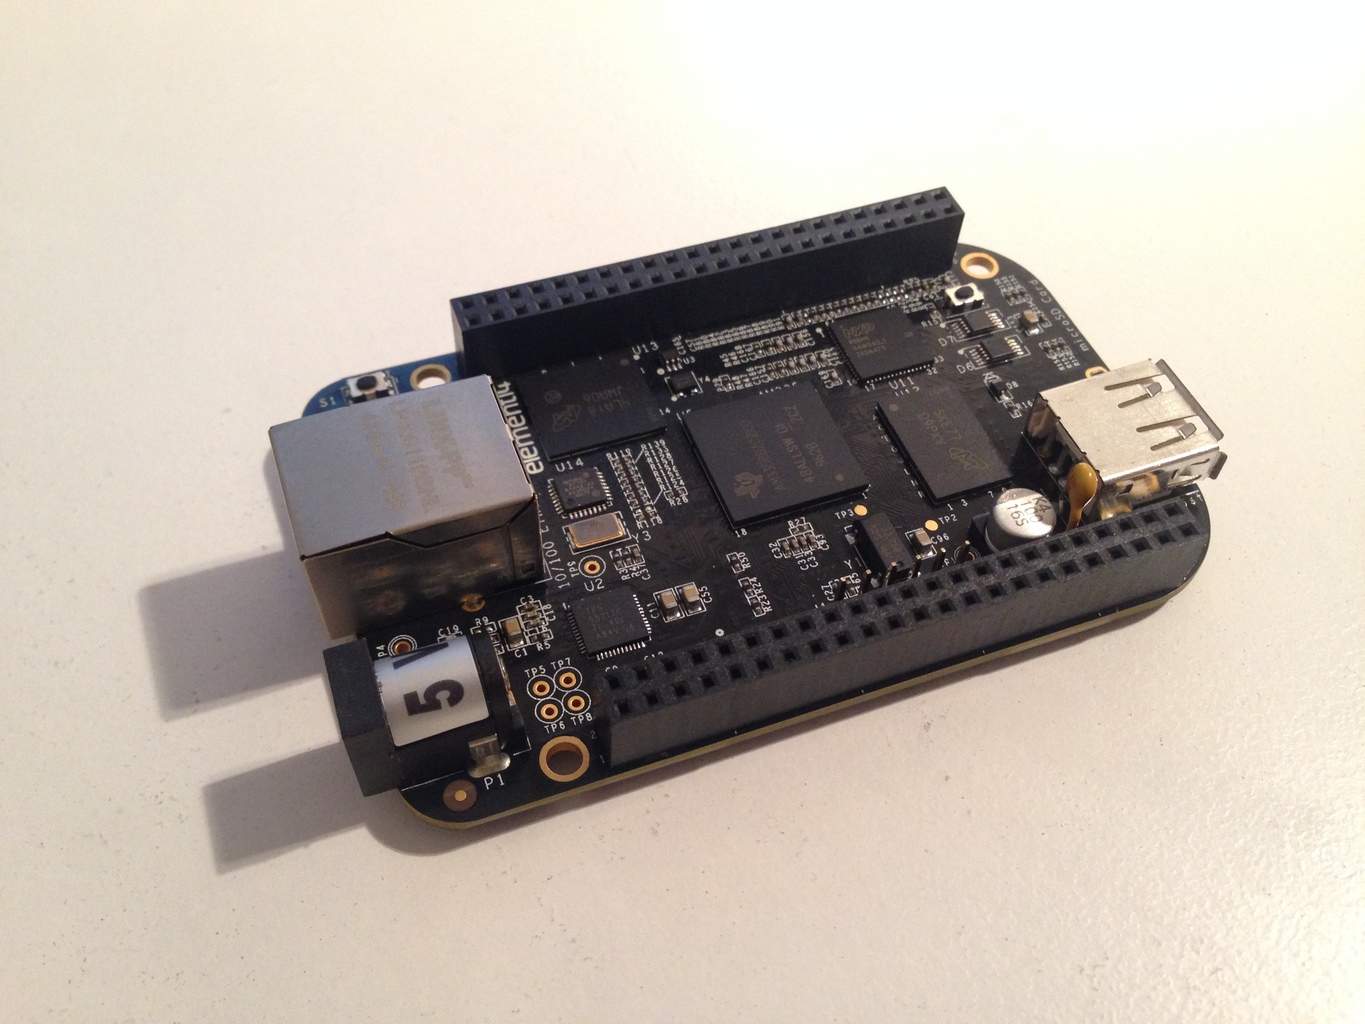
Unboxing the BeagleBone Black
Inside the box :
- a BeagleBone black
- a USB cable
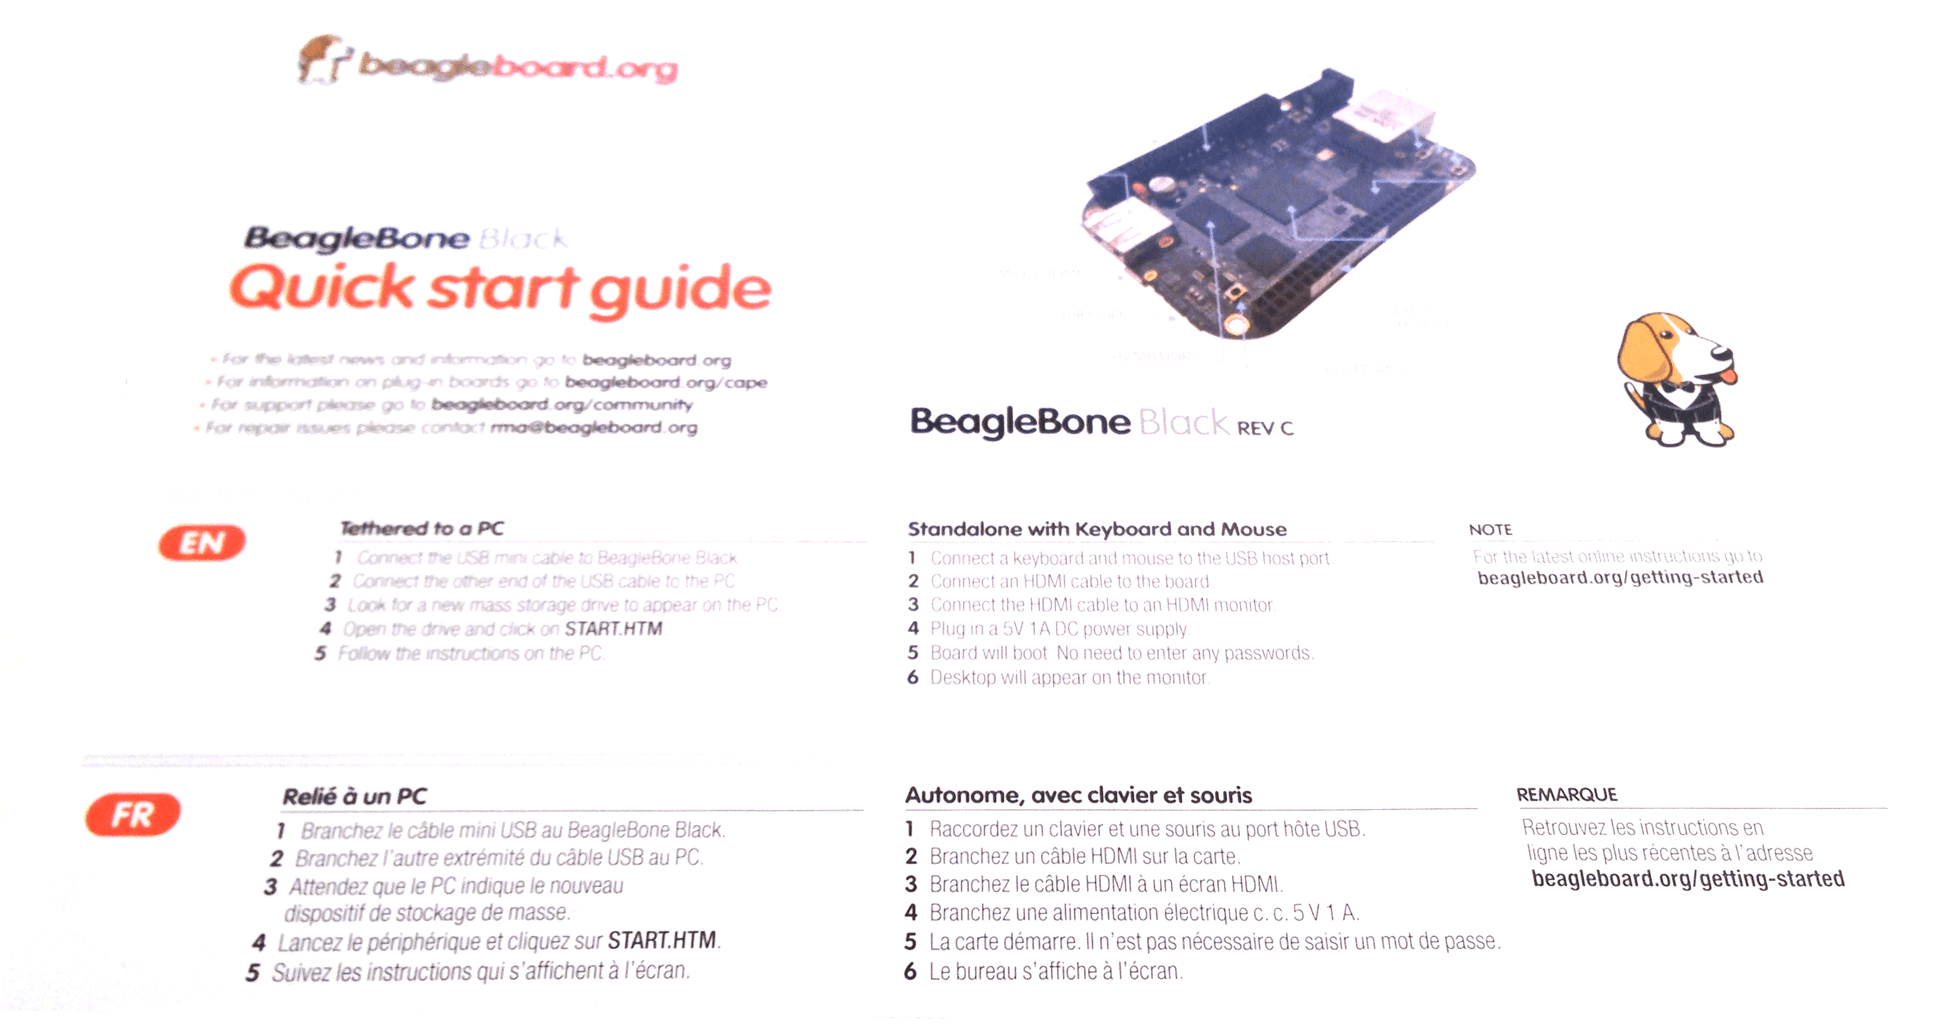
- a note on how to get started with BeagleBone Black
I would have loved to just jump right in and explore on my own, who needs instructions right? But I’m able to tame this desire and I decide to follow the instructions after all.
The pamphlet says that the board comes pre-installed with Debian Linux. And the board is ready to connect and play with.

Get Our Basic Electronic Components Guide
Learn how the basic electronic components work so that circuit diagrams will start making sense to you.
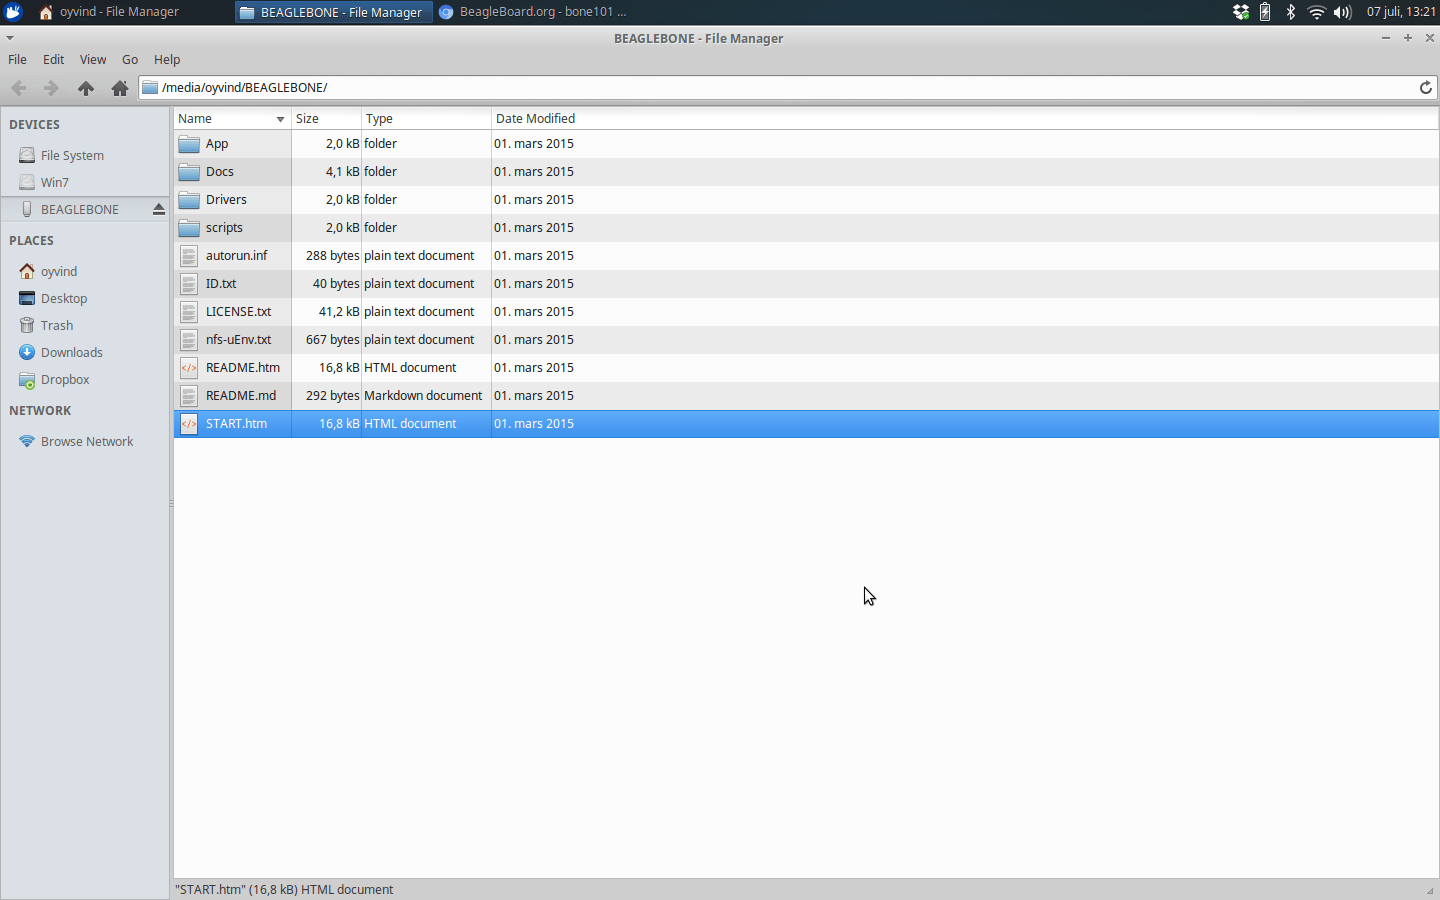
So, I plugged it into my XUbuntu computer with the provided USB cable.
…and after 1 minute, the BeagleBone appeared as an external drive on my computer. Just like it’s written in the instructions.
Installing Drivers For The BeagleBone Black
With the BeagleBone Black getting started is easy.
The instruction pamphlet told me to open ‘start.htm’ in a web browser.
So I did, and I found further instructions.
The next step listed was to install drivers for the BeagleBone. But, the drivers were already installed for me on my Linux computer.
NOTE: I also tried it on a Windows 10 machine. There the drivers were not installed and the provided drivers failed to install. I had to go to http://beagleboard.org/getting-started and get the latest drivers, then it went smoothly. Without these drivers, you can’t connect the BeagleBone network interface through the USB port.
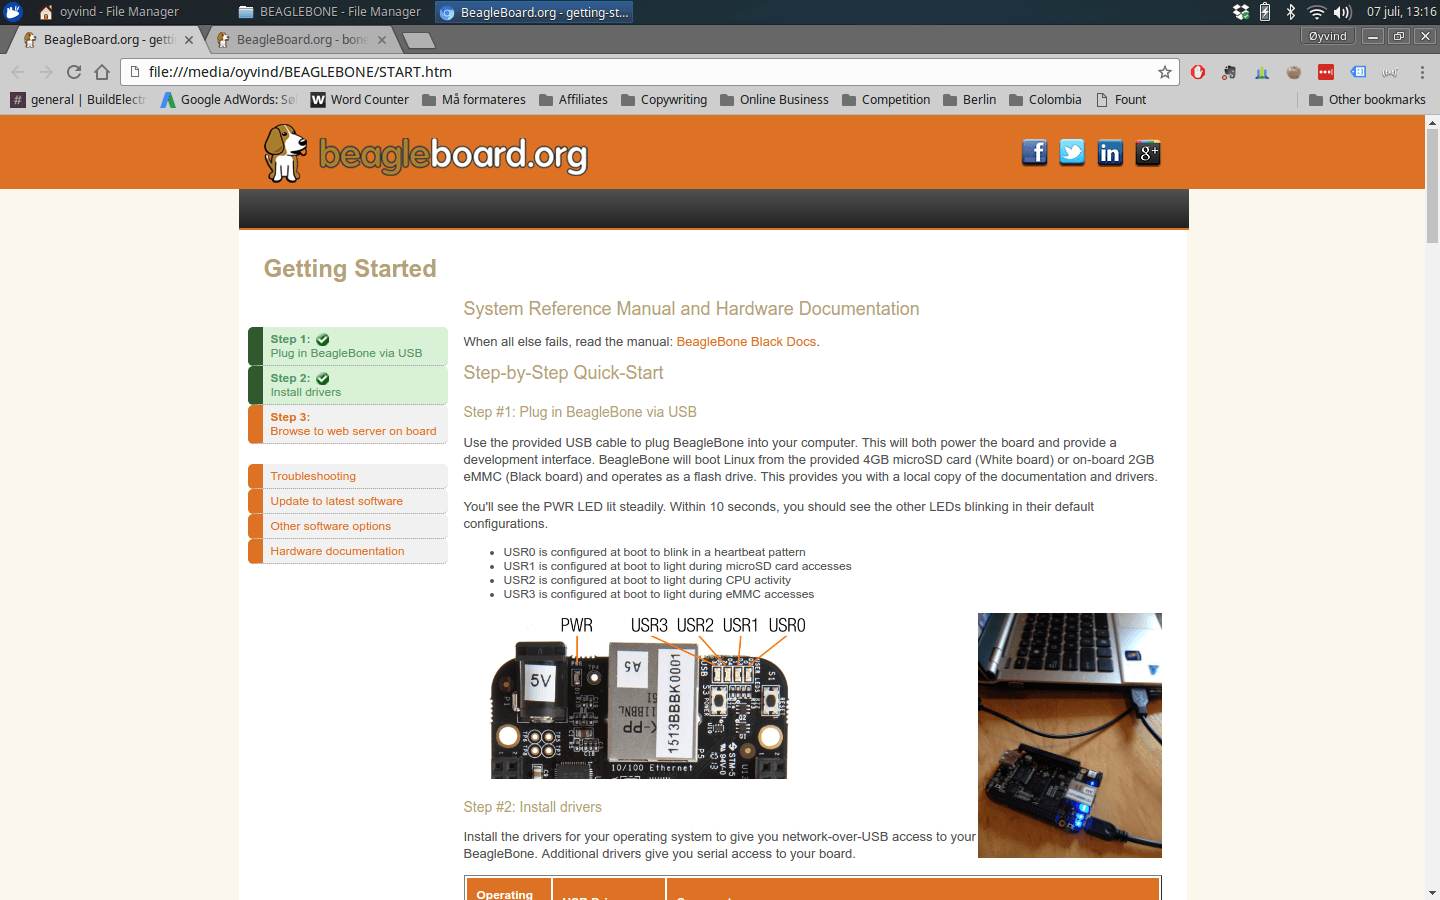
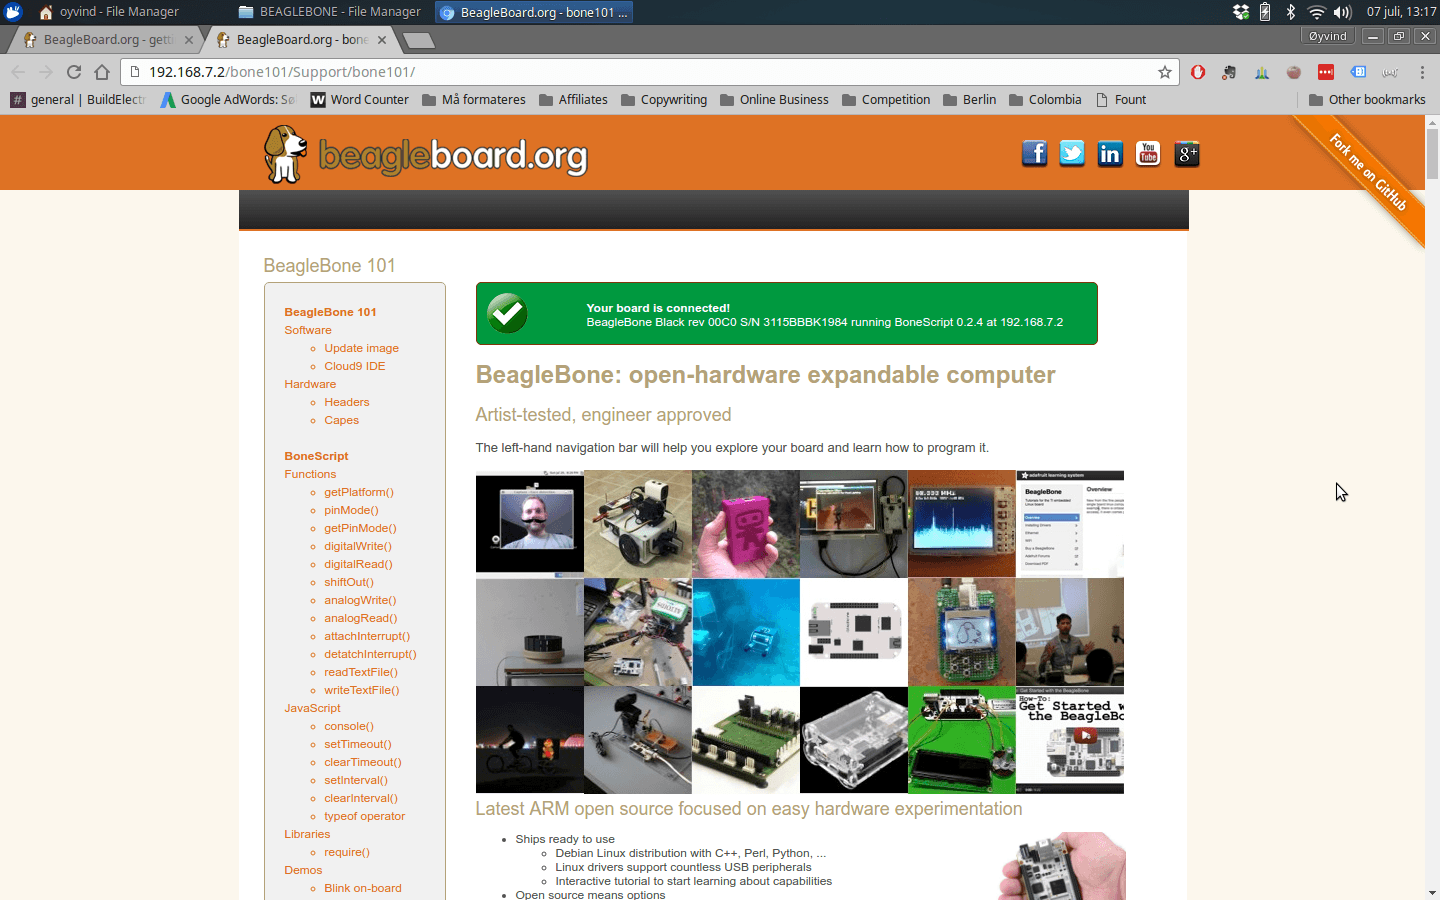
In step 3, the instructions tell me to open up the address http://192.168.7.2 with a browser that is NOT Internet Explorer. I guess IE has some issues.
There I’m told that my board is connected and that everything seems ok.
This means the drivers are working.
BeagleBone Black Getting Started Examples
Now it’s to try to do something with the BeagleBone Black.
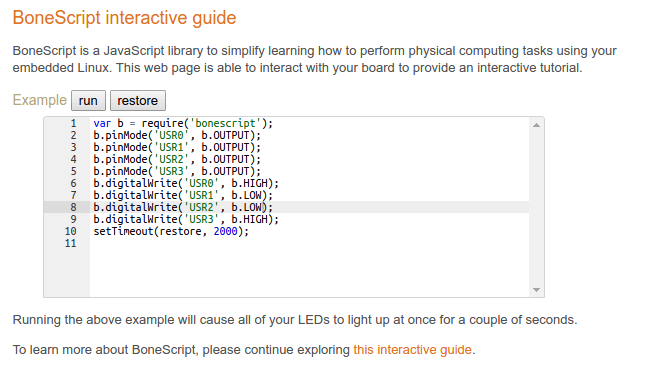
Under “BoneScript interactive guide” on the page that I’m on (192.168.7.2), I can try something called BoneScript.
Bonescript has an Arduino-like feel to it.
There’s a tiny editor window with some example code to turn the LEDs on the board on or off. I can modify the code in the window to experiment and get a feel for how it works.
Next, the guide presents something called Cloud9 IDE, with a short tutorial to get to know it.
Trying Out The Cloud9 IDE
I click on the link (http://192.168.7.2:3000/ide.html) and I’m taken to an Integrated Development Environment (IDE).

I follow the instructions, create a new file, and copy-paste some code into a new file in Cloud9. The code is an example of how to blink the LEDs on the board. A typical hardware equivalent of the “Hello World” of the programming world.
I try to save the file, but at first, I can’t find the menu where I’m supposed to find “Save”. But after some searching, I find a little arrow in the middle on the top line that reveals the menu.
I click on “Run” and one of the LEDs on my BeagleBone starts to blink.
Then I click on “Stop” to stop running the program.
And the LEDs stop blinking.
The tutorial stops there and gives a link on where to find more information about bonescript. So I guess I’ve just been using bonescript in this tutorial.
It also tells me that if I want to start scripts automatically on boot, I can save them in a folder called ‘autorun’.
That’s very useful information to have.
All in all, a good BeagleBone black getting started guide. Now I know how to make something simple, and I know where to continue for more information.
Cloud9 also has a command line tool, if you’re into that. On the bottom, you can find bash – BeagleBone that will give you command line access to your BeagleBone. This is great for installing things on BeagleBone for example.
The Next Step To Learn BeagleBone Black
This was a quick and easy guide to get an insight into the BeagleBone black and how you can get started.
The next step I did, and which I recommend you do, is to read a quickstart book on the BeagleBone Black. The book Getting Started With BeagleBone might be what you need:
Check out my Getting Started With BeagleBone review here >>

10 Simple Steps to Learn Electronics
Electronics is easy when you know what to focus on and what to ignore. Learn what "the basics" really is and how to learn it fast.
For us that do not know what Beaglebone is, a short introduction to the product would have been nice.
You’re absolutely right. I’ll write a “What is Beaglebone”-article soon. The short explanation is that it’s a credit card sized computer. Just like the raspberry pi.
Here’s the article: https://www.build-electronic-circuits.com/beaglebone/
I am curious as to why you selected this over the Pi 3. The main difference I see with the Pi and the Arduino is that the Pi is a full computer which helps some things but makes other things more difficult as timing can be off on the Pi due to multi tasking. Does the BeagleBone have a way of getting around this as it is also a full computer?
The BeagleBone is pretty much the same thing as the Raspberry Pi when it comes to hardware. This is also a full computer. The reason I chose this is two-fold:
1. The beaglebone has a much better physical connector socket and much more IO pins.
2. I need to control a lot of motors and read temperature sensors. There’s a really good expansion board for the Beaglebone called Replicape, designed by a friend of mine.
Here’s an extensive comparison between Raspberry Pi and BeagleBone Black:
http://makezine.com/2014/02/25/how-to-choose-the-right-platform-raspberry-pi-or-beaglebone-black/