Arduino is a microcontroller board that makes it really easy to program electronics. It’s an easy way to get started with microcontrollers that I highly recommend since it lets you jump right into the code and do stuff from the start.
You can use it both for building simple things like a blinking LED – and advanced stuff like building an internet-connected robot. With Arduino, it’s simple to build really cool electronics projects without learning a bunch of theory. And it’s fun!
It has several inputs and outputs that are controlled by simple commands that you write into a program on your computer.
What Is Arduino Used For?
Arduino is a board with a microcontroller that can easily be programmed from the Arduino IDE.
A microcontroller is a small chip with several input and output pins. You can write code, for example, to set an output to be HIGH or LOW. And if you connect a Light-Emitting Diode (LED) to that output, the LED will turn on and off, depending if the output is HIGH or LOW.
This is really cool because it means you can control things in the real world with code!
And you’re not limited to just blinking LEDs. You can build your own remote control. Or connect a radar to detect your breath. Or about anything else you can think of.
The difference between an Arduino and a bare microcontroller is that the Arduino board has components added so that you can plug it straight into the USB port on your computer. And it comes with software that makes it super easy to create code and upload it.
Basic Electronics for Arduino Makers
Learn the basics that every Arduino maker should know, and it'll open you up to a world of possibilities! Sign up for my circuit tips by email and I'll send you the eBook:
For example, you can build an oscilloscope with just 7 lines of code.
It’s designed to be really easy to use, even for non-technical people. But the fact that it’s so quick and easy to get a prototype up and working with Arduino, makes it a super helpful tool even for professionals.
The Basics of Arduino
To program your Arduino, you need to write C++ code in the Arduino IDE, then compile and upload this code to the Arduino board.
The basic structure for the code that you write and upload to your Arduino looks like this:
void setup() {
  // The code you place here runs one time, at startup
}

void loop() {
  // The code you place here is repeated indefinitely until you turn off the power
}
The setup() function runs one time, every time you power on your Arduino. This is where you set up everything you need for your program, like what pins should be inputs and outputs.
The loop() function starts after the setup() function has finished and runs over and over again until you turn off the power to your Arduino.

Inputs and Outputs
Inputs and outputs are pins on the Arduino that you can use to either get information into the Arduino (input) or make things happen outside the Arduino (output).
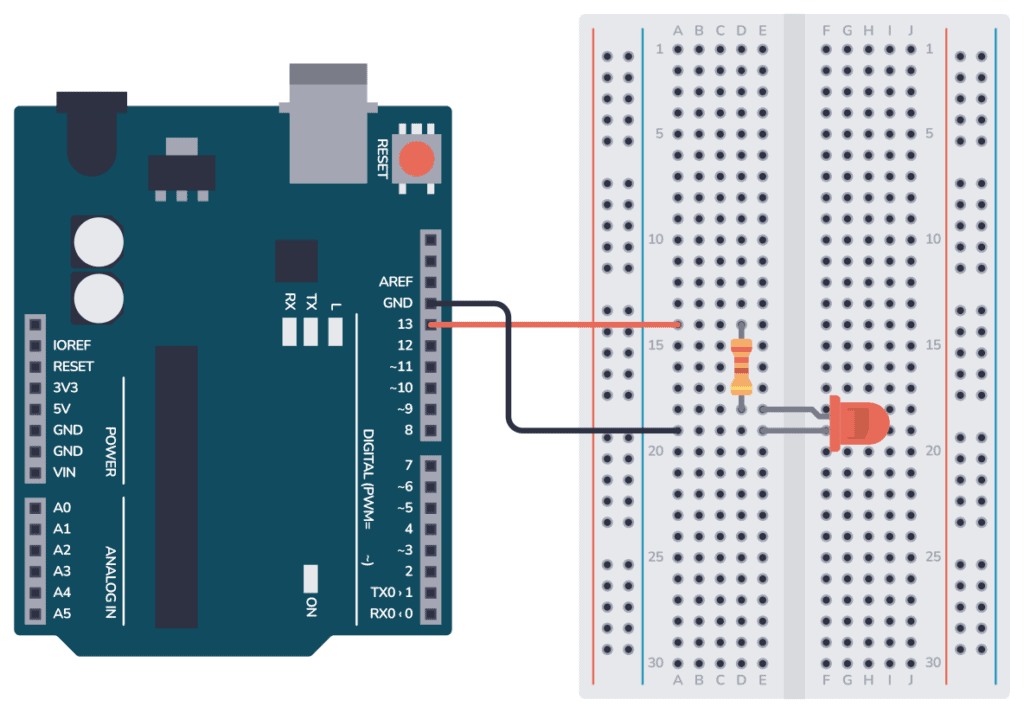
For example, if you connect an LED to an output you can turn the light on and off by using the digitalWrite() command in your program code:
void setup() {
  // initialize digital pin 13 as an output.
  pinMode(13, OUTPUT);
}

// The loop repeats indefinitely, so this will blink the LED
void loop() {
  digitalWrite(13, HIGH);  // turn the LED on (HIGH is the voltage level)
  delay(1000);             // wait for a second
  digitalWrite(13, LOW);   // turn the LED off by making the voltage LOW
  delay(1000);             // wait for a second
}
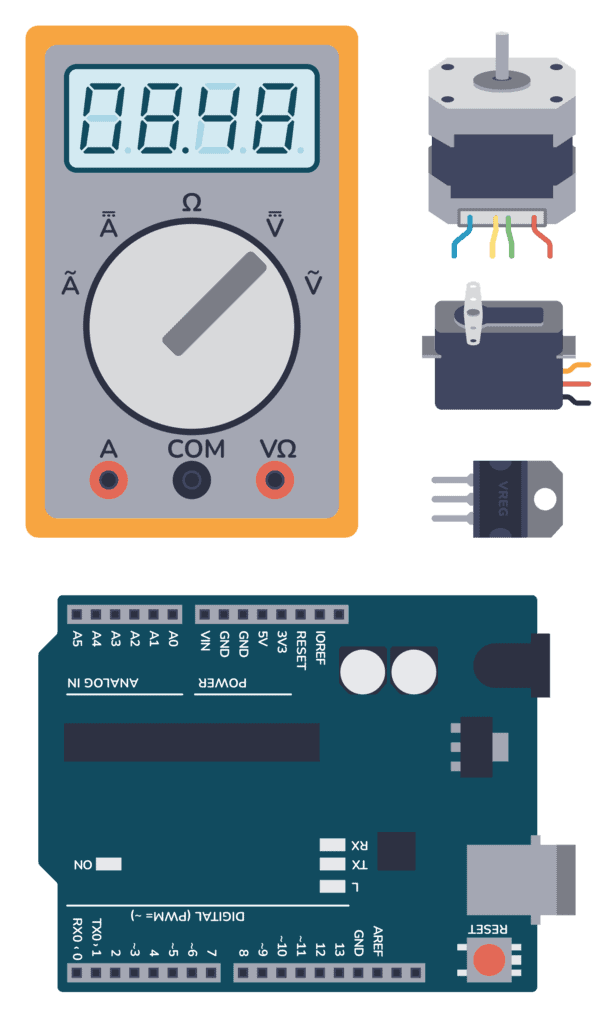
You can connect other things too. A buzzer to create sound, or a motor to make something move. This means the Arduino can “do stuff” in the real world.
Inputs are used to get information about what is happening in the real world. For example, you can check if the button is pushed or not by using the digitalRead() command. Or you can check the temperature in the room by connecting a temperature sensor and using the analogRead() command.
By combining inputs and outputs with some basic logic commands, you can make things happen automatically. Such as having a laser trigger wire to detect if anyone walks through a door, and making a ding-dong sound to alert a store clerk that a customer just entered.
Check out What Is Arduino Programming to learn more about programming an Arduino.
Overview of the Arduino Boards
There are many different Arduino boards available. At the time of writing, there are 52 different boards available from Arduino’s official shop. I usually recommend you start learning Arduino by getting the UNO or the Leonardo board. These are more or less equal, but the Leonardo has some extra USB features.
If you have any special needs, like lots of inputs/outputs, WiFi, more processing power, small board, then here’s an overview of the main Arduino board types:
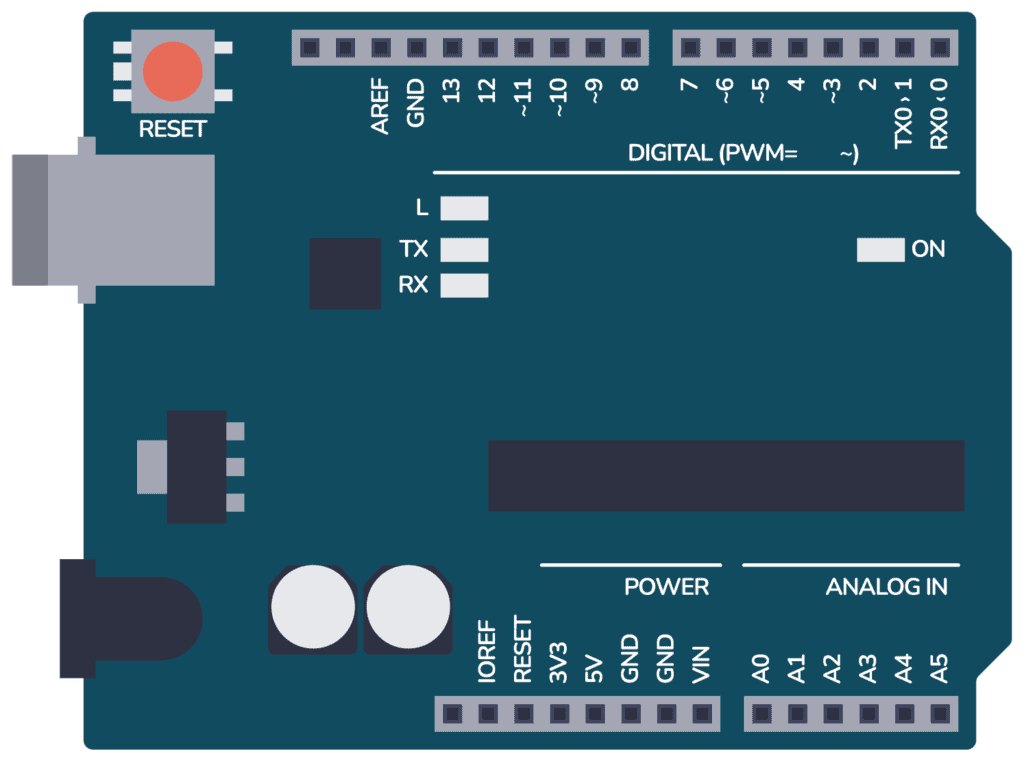
Arduino UNO
This is the “classic” Arduino board that most people start with. The form factor is simple to work with and you can easily connect jumper wires over to a breadboard to connect components.
It has 14 digital input/output pins (of which 6 can be used as PWM outputs), 6 analog inputs, a USB connection, and a power jack.
It’s based on the microcontroller ATmega328P which does not have USB communication built into it. Instead, it uses a secondary processor for USB-to-serial communication, which connects the microcontroller to the computer’s USB port.
Arduino Leonardo
The Arduino Leonardo looks like the UNO and is in many ways similar to it. But because it is based on the ATmega32u4, it has an advantage with built-in USB communication. This allows it to emulate computer peripherals like mice and keyboards, making it especially useful for projects involving direct interaction with a computer.
Arduino Micro
The Micro board is basically a smaller version of the Leonardo board. If you need a board with USB functionality that doesn’t take up much space, then this one is for you. Its small size makes it ideal for projects with a small footprint.
Arduino Nano
The Nano board is basically a smaller version of the UNO board.
Unlike the Micro, it is designed to fit into a breadboard and has two rows of pins that align with the standard breadboard’s pin spacing. This makes it easy to build prototypes without needing to solder or connect any wires.
Arduino Mega
If you want more input and output pins you should get an Arduino Mega board. It is based on the ATmega2560 microcontroller and is designed for projects that require more I/O lines, more sketch memory, and more RAM.
It has 54 digital input/output pins (of which 15 can be used as PWM outputs), 16 analog inputs, 4 UARTs (hardware serial ports), a USB connection, and a power jack.
The Mega is great for complex projects that require multiple sensors, large amounts of data, or both. For example robotics, large LED installations, or detailed data logging.
Arduino Due
The Arduino Due is based on a 32-bit ARM processor. It has the same amount of input/output pins as the Arduino Mega, just much more powerful.
It has 54 digital input/output pins (of which 12 can be used as PWM outputs), 12 analog inputs, 4 UARTs (hardware serial ports), an 84 MHz crystal oscillator, a USB OTG capable connection, 2 DAC (digital to analog), 2 TWI, a power jack, an SPI header, and a JTAG header.
The Due is perfect for more demanding applications that require high-speed processing, complex computations, or high-precision analog measurements.
Arduino Giga
The Arduino GIGA R1 WiFi is a new board of about the same size as the Mega and Due, but with some extra special features.
It has both Wi-Fi and Bluetooth, so you can connect it to other devices or the internet easily.
And it’s got two microcontrollers instead of one. One runs at 480 MHz and the other at 240 MHz, and they can talk to each other. This means you could use two programming languages – Arduino and MicroPython – at the same time.
It also has a few extra types of connectors to make building your project easier. This includes a USB-A connector, a 3.5mm jack (like a headphone plug), a USB-C connector, a Jtag connector, and a camera connector.
Arduino Mkr
The MKR Family is a set of boards and other parts that can be mixed and matched to make cool projects without needing extra wiring. Each board comes with a special radio part (except for the MKR Zero) that lets it connect using Wi-Fi, Bluetooth, LoRa, Sigfox, or NB-IoT
Arduino Portenta
The Arduino Portenta is a board designed for heavy-duty tasks.
It’s perfect for things like industrial jobs, complex computing, and running robots. The main board, the Portenta H7, has a dual-core processor that can handle demanding tasks really well.
It has Wi-Fi and Bluetooth, and some versions can even connect to mobile networks.
More Arduino Tutorials
Basic Electronics for Arduino Makers
Learn the basics that every Arduino maker should know, and it'll open you up to a world of possibilities! Sign up for my circuit tips by email and I'll send you the eBook:
i want to make rc plane but i could understsnd that how to make circuit board ..i am a fresher in electronic so would you help me.
my email id [email protected]
Please send daily build electronics circuit
How can I get the ardruino leonardo software in Nigeria
All Arduino software can be downloaded from arduino.cc
Best,
Oyvind
i work as an electrical engineer in an industrial manufacturing factory for years but i know i love electronics boards more than big/heavy electrical devices and switchboards…so may be i change my job to surf in electronics in the future after i excel some of it.
but i am really confused that (here they come, my Qs):
1. Should i start with arduino or raspberry pi or (atmel/pic) microcontrollers, not for hobby but to use as a profession at industry level.
2. C or C++ or C#…
C seems good for a start and also as for electronics.
C++ has more abilities than C?
C# is good for creating a windows gui control apps?
i saw P(rogrammable)L(ogic)(Controller)s as electrical devices not electronics btw, its ecosystem is electrical
1. Raspberry Pi is a great starter tool for getting into embedded systems that use operating systems. Arduino is a great tool for getting started on systems that use microcontrollers. Ideally you should know how to use both. But start with the one you find the most interesting.
To work on a professional level, it’s good to know more professional tools also, so consider jumping over to BeagleBone black instead of Raspberry Pi and to some kind of 32-bit microcontroller board instead of Arduino when you feel you understand Arduino and RPi.
2. I would stay with C to begin with as C++ has a lot of things that is not supported on some microcontrollers/compilers. C# is good for Windows GUI apps yes.
Dear Mr Nydal Dahl,
thank you very much…
so i understand that i had not to skip arduino or raspi and dive into embedded system directly;
instead i should start from them first.
Regards.
You can skip them if you want. But those are great tools for getting started.
Very Interesting article, this helped me alot really thanks sir.
I want learn how to program in electronic using c++
Sir i need your help plz.
I am passionate to learn Electronics practically from the ground level, also want to learn simple projects including Arduino.
How can i start?
Is there a good resource for example circuits and code. I’m completely new to the concepts of microcontrollers?
I would like to control my water pump and reservoir more efficiently than the simple logic circuit currently connected to the level sensors.
Hi, yes. Here’s a good place to start to get an overview: https://www.build-electronic-circuits.com/microcontroller-programming/
You can also find lots of code examples for Arduino in our Arduino section. Start from the Arduino Blink LED example (https://www.build-electronic-circuits.com/arduino-blink-led/) and build from there.