A Light-Emitting Diode (LED) is a small component that lights up when there is current flowing through it. It’s used in light bulbs, displays, lighting decorations, and much more. In electronics, it’s often used for showing the state (is the gadget turned on?).
You can see the light-emitting diode everywhere! In laptops, on mobile phones, on cameras, on toys, in our car +++.

It’s a type of diode, so it only works when you connect it with its anode towards your battery’s plus terminal.
Chances are you will be working with LEDs a lot when you start learning electronics. They are cheap and simple to use, and it’s a great way to check if your circuit is working properly or not.
How Light-Emitting Diodes Work
To understand how a light-emitting diode works, you need to get into the physics part of semiconductors. Simply explained, the LED is similar to a standard diode, but with the addition of a phenomenon called Electroluminescence.
The LED is made of electroluminescent materials, such as gallium arsenide, and has a p-n junction, just like a standard diode. When electrons in the semiconductor recombine with holes, they release energy in the form of photons, which is what makes up light.
The energy required for electrons to cross the band gap of the semiconductor decides the color of the light.
How To Connect A Light-Emitting Diode
An LED has two pins – anode and cathode:

10 Simple Steps to Learn Electronics
Electronics is easy when you know what to focus on and what to ignore. Learn what "the basics" really is and how to learn it fast.

The anode is the longest pin. This is the pin you connect to the most positive voltage. The cathode is the pin you connect to the most negative voltage.
They must be connected correctly for the LED to work. If you connect them in the opposite direction no current will flow, just as with standard diodes.
In addition to connecting the LED with the correct orientation, it’s important to connect it in series with a resistor to limit its current. A resistor connecting in series with an LED is called a current-limiting resistor.
Simple LED Circuit Example
Here’s a simple example of how to connect a light-emitting diode in a circuit:
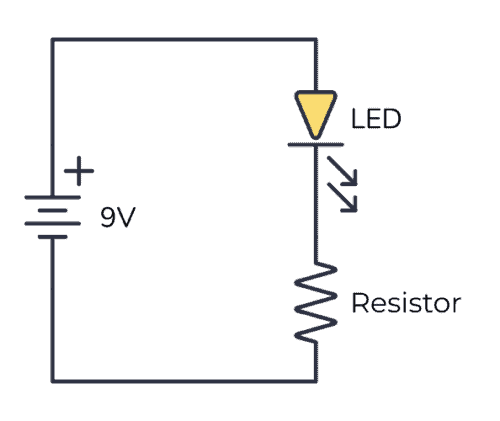
Usually, an LED needs about 2-3 volts and about 1-10 mA to light up. But this varies among different LED types. The easiest way to find this information is to look it up in the datasheet (look for LED forward voltage and Test Current) – or ask the store where you bought it.
You don’t have to worry too much about the voltage. For most standard LEDs, if you have a voltage of around 9V and use a resistor in series of around 1 kΩ to 10 kΩ, the LED will “grab” the voltage it needs.
If you run too much current through an LED, it will get really hot and break down. That’s why the resistor is there – to control how much current that goes through the LED. The only time you don’t need the resistor is when you have a battery or other voltage source that provides exactly the voltage your LED needs.
How To Blink An LED
If you want to blink an LED, you need to build an oscillator circuit that will turn the LED on and off. LEDs with this circuit built-in exist. But normal LEDs won’t blink without this circuit.
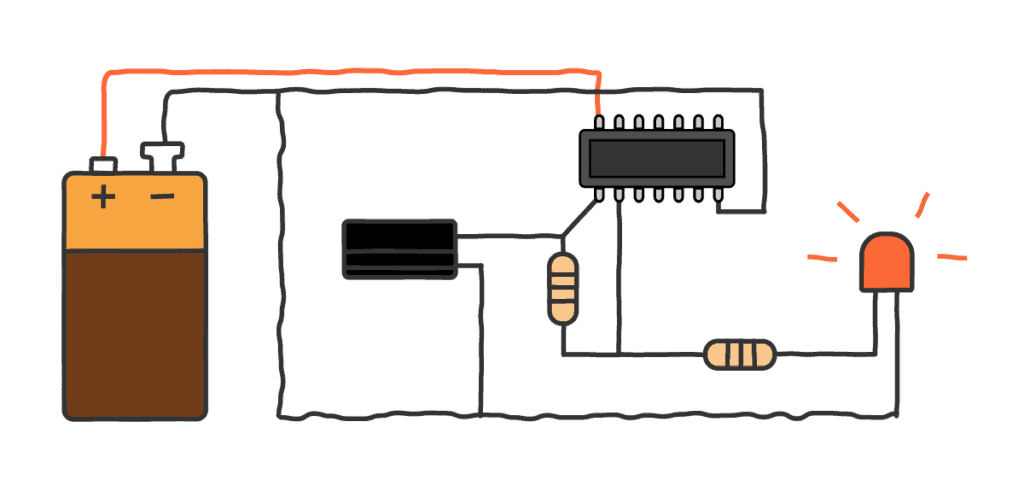
There are several ways to blink an LED, but one of the easiest ones to both build and understand is the blinking LED circuit based on a NOT gate.
How To Adjust the Brightness of an LED
There are two ways to adjust the brightness of an LED.
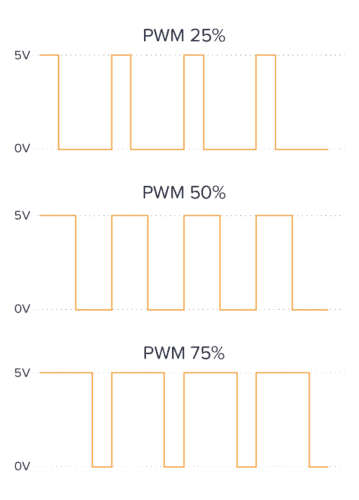
(1) You can turn the LED on and off really fast (using PWM), and the ratio between being on and off will decide how bright the LED will seem to the human eye:
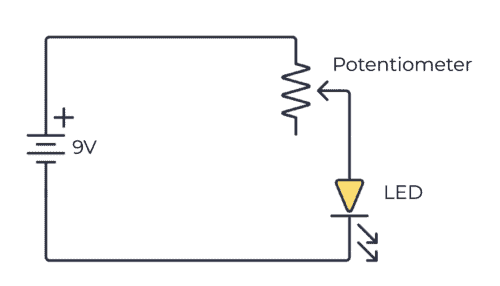
(2) Or you can control the current going through the LED, which directly translates to brightness. More current gives you more brightness. The resistor in series with the LED sets the current. So by changing the resistance of the resistor, you can change the brightness.
A potentiometer is a variable resistor. If you add the potentiometer in series with the LED, you can turn the knob of the potentiometer to adjust the brightness of the LED.
Light-Emitting Diode Colors
LEDs come in many colors. Common colors are red, green, yellow, amber, blue, and white. Or a combination of colors, like the RGB LED.
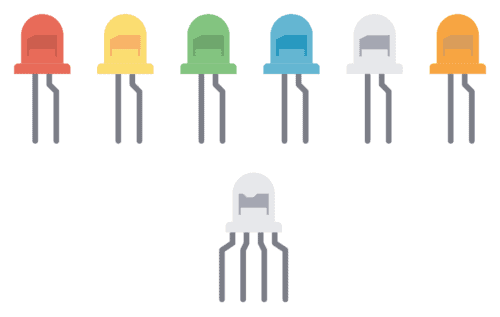
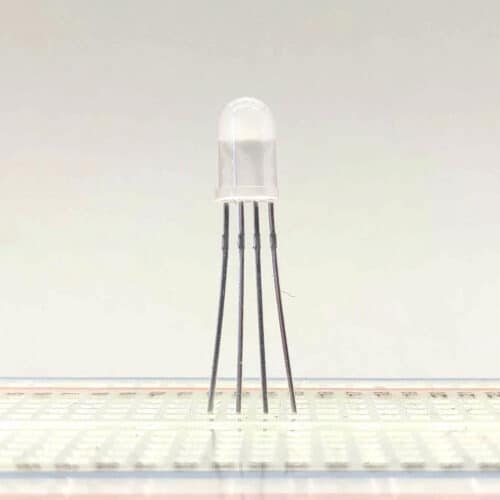
RGB LEDs (Multicolor LEDs)
RGB LEDs are LEDs that have three light-emitting diodes inside; red, green, and blue. By controlling the brightness of each color, you can combine them to create other colors.
Bicolor LEDs
Bicolor LEDs are light-emitting diodes with two colors. They are made so that if you set up the current to flow in one direction, you get one color, while in the other direction, you get a different color.
A typical color combination is red and green which you can use to show if your gadget is working correctly (green) or not (red).
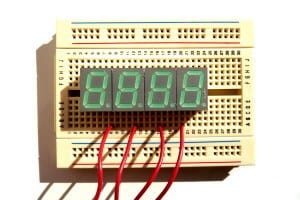
The 7-Segment LED Display
LEDs are also used to build displays. One of the simplest displays you can build with the LED is the 7-segment display. It consists of seven LEDs that you can turn on or off to display a number:
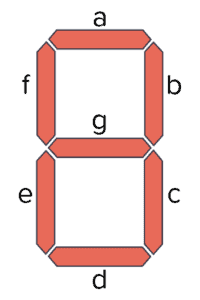
If you turn on all the segments, you get an 8. If you turn on only the b and c segments, you get a 1. These displays are common in alarm clocks and other places where you only need to show a number.
More Light-Emitting Diodes (LED) Tutorials
10 Simple Steps to Learn Electronics
Electronics is easy when you know what to focus on and what to ignore. Learn what "the basics" really is and how to learn it fast.
Great stuff, and i have subscribed. How do I get the book?
(this is second request.)
Oops, I just noticed you prior response to same inquiry, and I have requested via email.
okay
Nice article, Øyvind. LED application has touched and revolutionized many industries today.
i really enjoy articles from this site.grt job guys
please make an app….
you guys have really cool and fun stuff….
is there any way to download the content….
I read this article it is very useful information. LED is nice topic. thanks sir
You said, “If you run too much current through an LED, it will get really hot and break down.”
As LED is a PD and the power supplier is a PSE, we commonly know a PSE doesn’t forcibly push current into a PD. Rather PD draws current from PSE depending on how hungry it (PD) is.
Say there is a 12V 5A rated power supply. Can’t I use it on a CCTV camera or DVR that is rated 12V 1A or 2A?
A power supply of 12V 5A can supply 12V and *up to* 5A. So if the device you are powering only needs 1A or 2A, then that’s no problem. The device only draws what it needs.