Do you want to adjust the brightness of your Light-Emitting Diode (LED)? If we break it down to the most basic, there are two ways to change the brightness of an LED:
- Changing the resistance value.
- Turning it on and off fast (Using PWM).
Below I’ll explain the two options and show you circuits you can build.

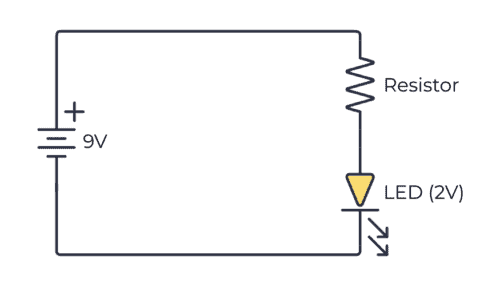
Option 1: Change the resistor value
The brightness of an LED depends on the current through it. A resistor in series with the LED sets the current. In the circuit below, you can see the basic setup for controlling an LED:
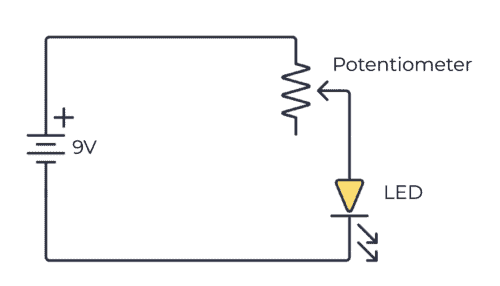
A potentiometer is a variable resistor that you can use to change the brightness of the LED. Just add the potentiometer in series with the LED. When you adjust the knob of the potentiometer, the brightness of the LED will change.
Option 2: Turn it on and off fast (PWM)
Another method is to turn the LED on and off fast. Maybe a few hundred times per second. Usually, you want to use a microcontroller for this. By adjusting the percentage the LED is on versus off, it will appear to the eye that the brightness changes.
This method is called Pulse-Width Modulation (PWM).
It’s also possible to create a PWM signal with a 555 timer. Here’s a sample circuit:
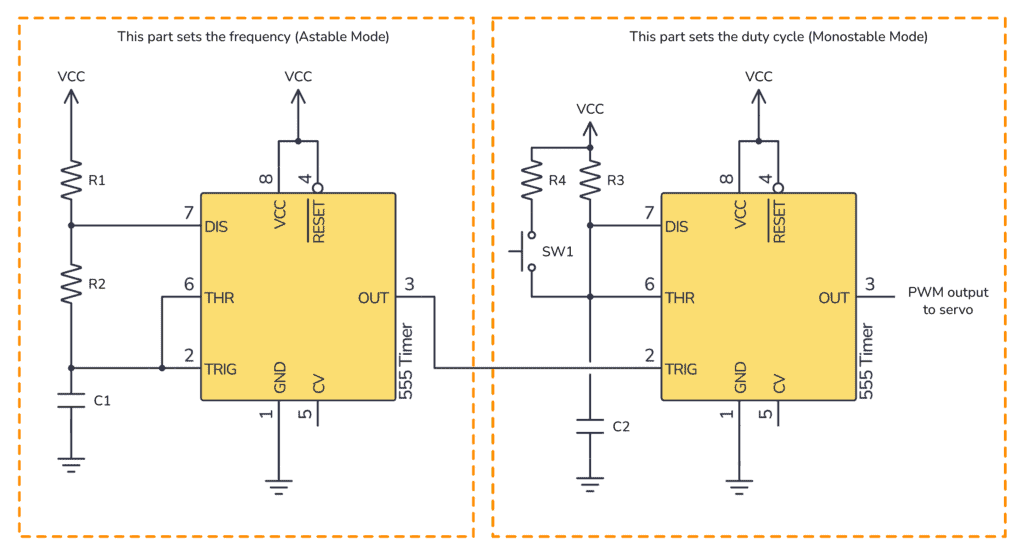
SW1 is an optional button that you can use to have two different duty cycles. I used it to control a servo motor in two different positions.

Get Our Basic Electronic Components Guide
Learn how the basic electronic components work so that circuit diagrams will start making sense to you.
Note that the duty cycle cannot be lower than the duty cycle of the first 555 Timer (that sets the frequency). So make sure you use components that have low enough OFF time for the duty cycle you want to use
More Light-Emitting Diodes (LED) Tutorials

10 Simple Steps to Learn Electronics
Electronics is easy when you know what to focus on and what to ignore. Learn what "the basics" really is and how to learn it fast.
Pls teach me to build a circuit
Hey, you can start here: https://www.build-electronic-circuits.com/electronics-for-beginners/
Cheers!
Oyvind