 You don’t need fancy equipment to do SMD soldering at home. You can easily do it using a soldering iron.
SMD stands for Surface Mount Device and they are components that you solder on the surface of a circuit board.
Let me guide you through how to do SMD soldering with a soldering iron.
(The most common method to solder these components is using an oven. Also called SMD Reflow Soldering)
SMD stands for Surface Mount Device and indicates that the component is mounted on the surface of the circuit board in contrast to through-hole components which are mounted in holes.
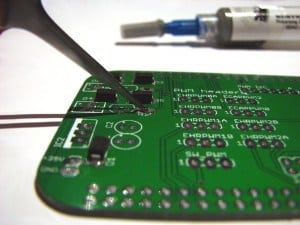
These are the soldering tools you should have in order to solder surface mount components:
- Soldering iron (use a thin tip if you have)
- Solder
- Solder flux (useful, but not necessary)
- Tweezers
- Microscope or a loupe
How to solder a surface mount resistor
Soldering a resistor is the simplest way to start learning SMD soldering.

10 Simple Steps to Learn Electronics
Electronics is easy when you know what to focus on and what to ignore. Learn what "the basics" really is and how to learn it fast.
Start by applying flux to one pad on the circuit board. The flux cleans the pad and makes it easier for the solder to fasten properly.
Apply some solder to the tip of your iron and touch the circuit board pad with the tip so that some of the solder passes on to the pad.
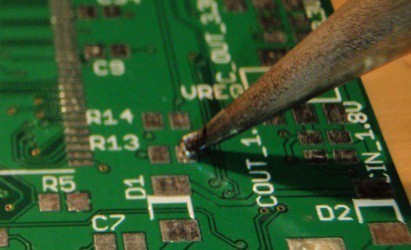
Place the resistor in its place an hold it there with a pair of tweezers while you touch the soldering tip so that it heats both the component and circuit board pad.
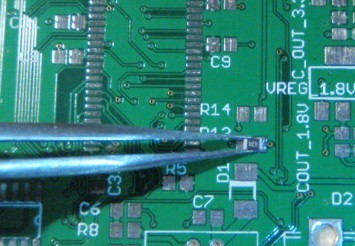
The resistor should now be fastened on one side. Apply solder to the soldering tip again and touch the iron tip on the other side.
Your resistor should now be good to go, but you might want to inspect the solder joints with your microscope or loupe to make sure the connection is good.
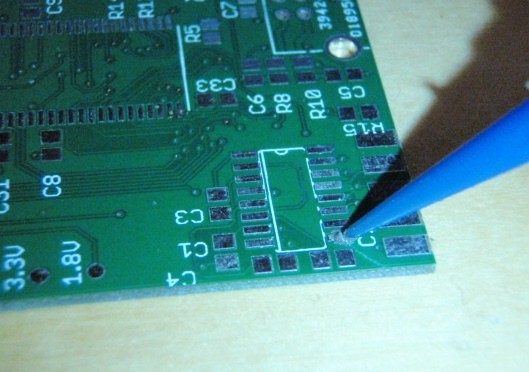
How to solder surface mount chips
The method to solder a surface mount chip is very similar to the method for soldering a resistor.
Start by applying flux on all the pads on the circuit board.
Apply some solder to one of the chip’s corner pads.
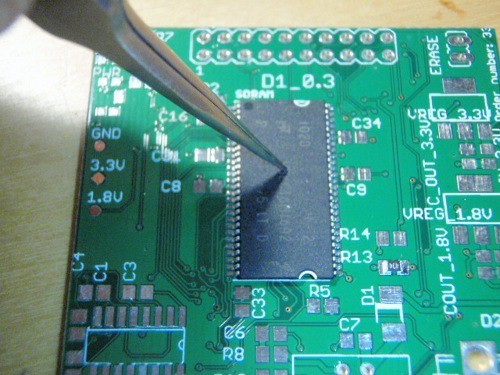
Place and align the chip using tweezers.
Hold the chip in place while touching the corner pad with the tip of the soldering iron so that the solder melts the pin and the pad together.
Check the alignment of the chip. If it is not in its place, use your soldering iron to loosen the pin chip and align the chip properly.
Continue soldering on the opposite corner by putting a bit of solder on the soldering iron tip then touching the circuit board pad and pin at the same time. Do this for all the pins of the chip, one by one.
After all the pins have been soldered you should inspect the solder joints carefully with a microscope or loupe to check for bad joints or solder bridges.
Alternative methods
There are a few alternative methods of SMD soldering. Below, I will explain two methods that I use.
Using solder paste
Start by applying flux to the circuit board pads. Then apply solder paste on the all the pads of the component you want to solder.
Using tweezers, place the component in its correct position and hold it there. Place the tip of the soldering iron onto each of the pads so that the solder melts and makes good connections between the component and the board.
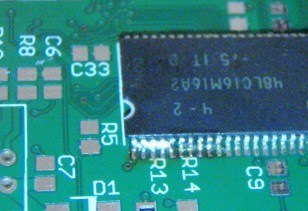
Flood with solder
This method is for soldering chips.
As usual start by applying flux to the pads on the circuit board. Fasten one of the corner pins of the chip to its pad by using a bit of solder. Make sure the chip is properly aligned on the pads.
Now use your soldering iron and flood the pins with solder so that all the pins are connected. On the picture below, only a few pins are flooded, but the idea is to flood all the pins.
Then start on one end and heat a pin so that the solder melts on the next 2-3 pins. Use a solder sucker to suck up excess solder.
Continue down the row and heat 2-3 pins at once while you suck the solder away. After all the excess solder has been removed, check for solder bridges with a microscope.

An SMD soldering method not covered here is the reflow oven.
This is the most common soldering method in the professional world.
Return from SMD Soldering to How To Solder
More Soldering Tutorials
10 Simple Steps to Learn Electronics
Electronics is easy when you know what to focus on and what to ignore. Learn what "the basics" really is and how to learn it fast.

Hello I tried to download your free book about simple circuits. However it would not allow me to. Please can you sort it out for me.
Thanks Robert Wood.
Hi, please let me know what the specific problem was. Does the link not work?
Cheers!
Oyvind
Have been trying to download both the free ebook and mini ebook without success. Please kindly help me out here? This is something that really got my attention, as would like to learn more on electronics but haven’t the faintest idea where to start. I have basic soldering skills having learnt the basics in highschool many years ago, but, it did not cover the finer details of circuits, design and building of entire projects.
Where does it stop? Are you getting an error message?
Cheers!
Oyvind
Thank you. Your simple tip helped me.
Great =)
Very good info. Thank you VERY MUCH!!!! =) As a another stated, I too have basic soldering skills that I learned 15-20 years ago in school. I have done all aspects of computing, But now I find my self getting a soldering gun with some other tools to do some hands on repairs. A good trade to add to my list of skills. ….BOOKMARKED! :D
Great to hear!
Hi, can you please briefly discuss how to solder QFN packages? Thank you.
tanks that is may work
Thanks for disseminating this wonderful knowledge. Pls in the act of soldering, must your solder (ie. lead) be dropped @ the tip of your soldering iron_before proceeding?
It’s good to tin the tip with some solder first, yes. But you apply the tin directly, not via the iron.
A solder sucker is the last thing I would use. Just touch #0 solder wick to the leads and remove excess.
Agreed. Solder Suckers should be in a Museum.
Wick has limits and a good sucker can make quicker work of many desoldering tasks.
I do not think tha tg the skill exists with soldering SMD, but rather DE-SOLDERING them.
Thanks for the great tutorial. You’d efforts with sharing knowledge do not go unnoticed nor unappreciated by big brother watching you ;)
Blog is really very helpful. Glad to learn and understand the concept of SMD soldering. Thanks for sharing the blog.