fbpx

The Basics Of Microcontroller Programming

A microcontroller does not know what to do by itself. It’s your job to tell it what you want it to do. Microcontroller programming boils down to three steps:

  • write program code on your computer
  • compile the code with a compiler for the microcontroller you are using
  • upload the compiled version of your program to your microcontroller
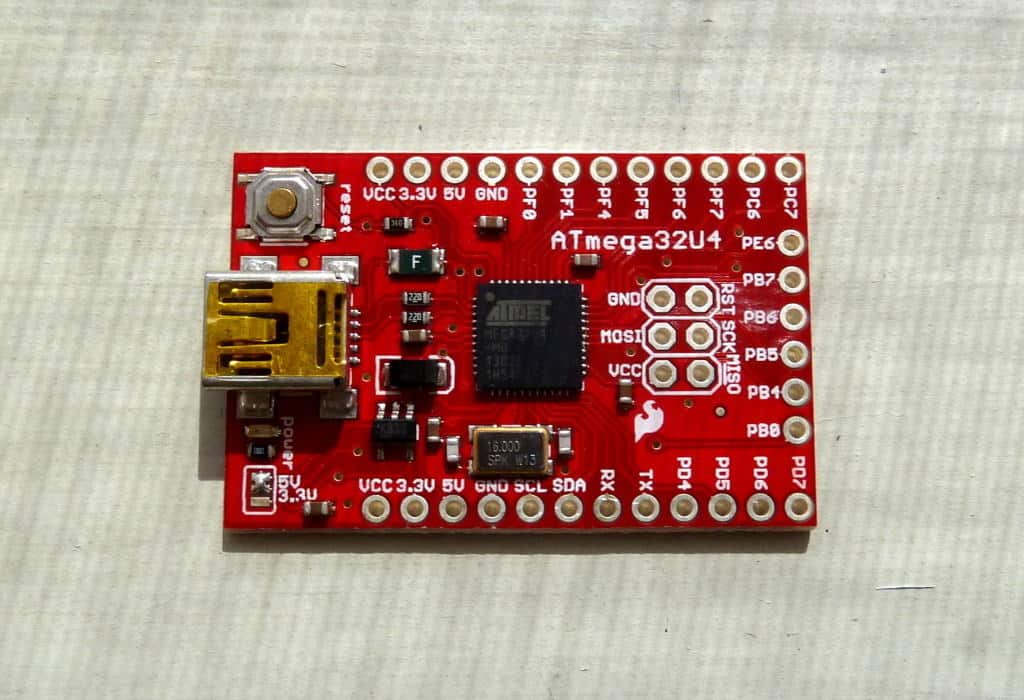
Microcontroller programming Board ATmega32u4 from Sparkfun
Arduino Programming

Write your program code

At the most basic level, a microcontroller understands only zeroes and ones (binary code). A program is a set of instructions written in a language the microcontroller can understand, telling it what to do with those zeroes and ones.

The first step is to write your program code. This is often done in C. But other languages are can work, depending on the microcontroller and its available compilers.

Key Building Blocks of Microcontroller Programming

Variables

Variables are like containers for storing data.

int age = 25; // Integer variable 
float temperature = 26.5; // Floating-point variable 
char initial = 'J'; // Character variable 
bool isRunning = true; // Boolean variable (true/false)

Operators

Operators perform actions on variables and values.

int sum = 10 + 5; // Addition 
int result = 10 % 3; // Modulo (gives the remainder: 1) 
bool isEqual = (10 == 10); // Comparison (isEqual will be true)

Comments

Sometime it’s useful to have comments to let other programmers (or your future self) know what you are trying to do with the code. You can use single line comments or multiline comments.

// This is a single-line comment in C 
/* 
This is a multi-line
comment in C 
*/

Control Flow

Conditional Statements:

Conditial statments are ways to do one thing if one statement is true (like a button being pressed) or another thing if not.

if (temperature > 30) {
 // Code to execute if temperature is greater than 30 
} 
else if (temperature < 20) { 
// Code to execute if temperature is less than 20 
} 
else { 
// Code to execute if none of the above conditions are true 
}

Loops:

Loops are ways to go through a series of numbers or other type of data. It can also be used to do something a certain number of times, like blinking an LED ten times.

for (int i = 0; i < 5; i++) { 
// Code to repeat 5 times 
} 
while (isRunning) { 
// Code to repeat as long as isRunning is true
 }

Functions

You can create you own functions that do something specific. This is especially useful if you want to do the same thing several places in your code so that you don’t have to repeat the code so many times.

int calculateArea(int length, int width) { 
int area = length * width; 
return area; 
}

Software For Writing Code

It doesn’t matter what software you use to write code. You can even use Notepad for this step. I like to use a really simple editor. But one that supports syntax highlighting makes the coding a bit easier. For Windows, my favorite is Notepad++

Arduino programming is a bit easier if you want to start really simple.

Compile your code for your microcontroller

Before you can upload your program to your microcontroller, you need to compile it. This means converting the code from human-readable code (words that make sense) to machine-readable code (1s and 0s).

Use a compiler that supports your microcontroller and compile your code into machine-code for your chip. A popular compiler for Atmel AVR microcontrollers is avr-gcc. Or if you’re using an Arduino, the compiler is included in the Arduino IDE.

After compilation, you will have one or more files containing machine code. Then you need to upload these files to your microcontroller. If you’re using the Arduino IDE, you just click on the Upload button.

Upload the compiled file(s) to you microcontroller

Usually, it’s one program file and a file for EEPROM and/or flash that you need to upload.

You need a physical connection from your computer to your microcontroller. Either you can use a dedicated programmer (such as the AVRISP for AVR microcontrollers), or if you have a USB programmable chip you can program it with a USB cable (my preferred method).

And you need a program for uploading the file(s). For AVR chips, you can use AVRDUDE.

For Arduino, you use a USB cable. The programmer is already on the board and uploading the compiled files happens automatically.

Next Step

With the main steps of microcontroller programming fresh in mind, it’s time to start building. If you are starting out, I would recommend starting with a microcontroller board. Arduino is the simplest, but there are many more available.

You can find lots of code examples for Arduino in our Arduino section. Start from the Arduino Blink LED example and build from there.

I’ve aslo written a very popular 5-part Microcontroller tutorial that takes you through the steps of building your own USB-programmable microcontroller board from scratch.

More Microcontrollers Tutorials

48 thoughts on “The Basics Of Microcontroller Programming”

  1. Hi…, am thankgod, thank you for your post, but am having a problem with programming. i don’t know how to write a programme, please can you send me any tutorial maybe with videos, pictures and programming software. Thanks in Anticipation.

    Reply
  2. I bought your ebook Getting started with Electronic and went to my email to click the link that you sent me and appeared a windows with 3 downloads and I click them and only reached to download one of the 3 downloadable ebooks

    Reply
  3. i am doing a microcontroller project to allow me trace the location and speed of my car via gps and gsm, pliz take me through programming,

    Reply
  4. sir i want to make digital screen for writting in college. So that there is no use of paper . I dont know how can i start and how to write code in c language to make digital board .

    Reply
  5. Hi there. Thanks for sharing this – I’m a complete beginner but found your article interesting and easy to understand. I do have a question – how “testing” work, if I want to use a programmed microcontroller in a simple robot? Would one normally have to compile the code and upload it in order to see if the robot does what the code needs it to do? In equivalent terms, if I were to program a webpage, I can see rather quickly if the code is laying out the page correctly – what’s the best way to “test” when it comes to microcontrollers?

    Reply
    • Hey KC,
      For testing without actually testing in real life, you can use emulators.

      I prefer testing in real life though…

      Best,
      Oyvind

      Reply
  6. Thank you sir, is time i start microcontroller programming, i really need to…, help me achieve my dreams am a novice, but i believe i can do it with you as a tutor, thanks again.

    Reply
  7. The big problem is (especially for me) is C++ programming. I can draw and make any electronic circuit, analog and digital, but I can not programming. Is there any C++ tutorial programming?
    I really want to start to learn how to make a program and how to upload to the Microcontroller.
    If we can not make a program even as simples as just to switch on the LED, and do not know how to upload the program then that is dead circuit, the circuit does not work as we want/design.
    To understand programming we have to know logical thinking and the meaning of any what we want to write would you mind to copy your answer to my email?
    Thanks for the tutorial.

    Reply
  8. hey admin, thx for the great explanation. i too i am a beginner in micro-controller programming. working on a project of regulating light intensity and this requires use a programmed micro-controller. how can i do this…thx again in advance.

    Reply
  9. I am in my forth and am starting my project anytime , dreaming to do sth on microcontroller. I have knowledge of many languages but I don’t know which is the best plz advice me.

    Reply
    • Hey Larry,

      If you find dead links, please let me know about them so I can fix. I have so many pages now that it’s impossible to go through everything manually…

      Best,
      Oyvind

      Reply
  10. Hey There!
    I Would Really Like To Learn How To Make Something Type Some Text On It’s Own, Without Me Touching It At All. Something Like A Rubber Ducky USB But Without The USB. I’m Really Not Sure On How I Do This. What Do You Recommend.

    P.S: I Have Hardly Any Experience In Coding. So Can You Recommend The Simplest Answer Please.
    ~ Jacob Hughes

    Reply
    • Type some text on a computer? If you don’t want to use USB, I guess the only other option is Bluetooth. The simplest way that I can think of to make that happen would be to use an arduino and a bluetooth module.

      Best,
      Oyvind

      Reply
  11. Many of these comments were quite entertaining. I started in C# and paired it with unity game design. But I absolutely fell in love with C. C is so simple and to the point. And I designed robots as a kid but never built any. I think it’s time to build and program some robots!

    Reply
  12. I have a problem that I am trying to figure out. I have a clock that works from remote control but i have two different remotes the only problem is the zero and minus buttons are switched on the remotes but the clock only works correctly with one remote with the zero on the right side and the minus sign on the left side but the remote I want to use has the zero on the left side and minus button on the right side all the other buttons work correctly how can i program the clock microcontroller to read the remote i need to use?

    Reply
  13. How or why is this guy responsible to help any of you write specific code for your specific projects. Do your own research and if you dont like programming, Find something else to do or be prepared to pay him for his time. Probably about $100 per hour

    Reply
  14. In my project, I want to use micro controller board instead of 1 monitor and 1 CPU. I am thinking about using Raspberry Pi. Is it fine? I want more information to proceed in this direction. Could anyone please help me?

    Reply
    • Hi Kush,
      Rapsberry Pi isn’t a microcontroller board. But since you want to add monitor, I’m guessing you’re not actually looking for a microcontroller board. Raspberry Pi works fine with a monitor.

      Reply

Leave a Comment