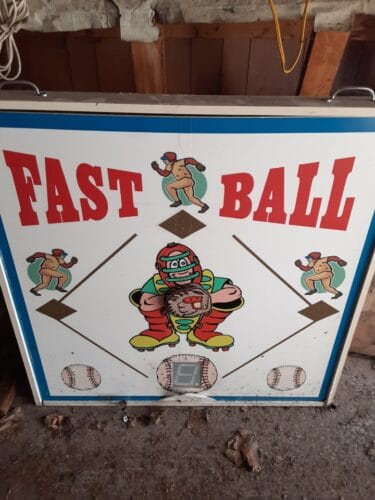
Halloween Electronics Project: Jack-O-Lantern

In this Halloween electronics project, I’ll show you how to make a cool Jack-O-Lantern. I used a 3D-printed carved pumpkin, but a real one works just as well (or even better!).

The Jack-O-Lantern Halloween Project

The project is based around three normal LEDs that I control so that they look like a flickering flame. Since my “pumpkin” was very small, I used 3mm LEDs. For bigger pumpkins, I recommend using bigger and brighter LEDs. For example these ultra-bright orange LEDs.

The LEDs are connected in series with a resistor to the PWM pins on the Arduino so that I can control the brightness. And in the code, I change the brightness of each LED to a random value for every 50 milliseconds.

The result? Check out the video below:

The Sunrise Wake-Up Alarm

In this tutorial, you’ll learn how to build an sunrise wake-up alarm. It’s a light-sensitive circuit that will activate a buzzer when you have light shining directly on it. Place it in your window at night and the alarm will activate in the morning when the sun rises.

Circuit Ideas And Where To Find Them

Circuit ideas are everywhere! There are many places to find cool circuits.

The greatest sources for my inspiration are hacker/maker/electronics blogs, schematic webpages, hobby project pages, and open-source hardware companies.

Or you can also check out some electronic kits for inspiration.

Sometimes I just want to try to replicate an electronic circuit I’ve found on the web. Either because it is something I need or just to prove to myself that I can do it. Like this amplifier circuit diagram.

Sometimes I find something cool that I want to modify and improve on. And other times I get completely new circuit ideas out of the blue that I want to build.

How To Build An Automatic Night Light Circuit

In this tutorial, you’ll learn how to build an automatic night light circuit that turns on when it gets dark. It’s a simple circuit that you can build on a breadboard.

This circuit shows you how to do it with an LED. But you can use the same principle to turn on bigger and brighter lights too.

Find the breadboard diagram and parts list below the video.

How to Build an Arduino Theremin

In this short tutorial, you will learn how to build an Arduino Theremin. You only need three components plus the Arduino, wires, and breadboard.

Use the breadboard diagram or the video below to see how to connect everything.

Simple VU-Meter Circuit

I put together this Voltage Unit (VU) meter using LEDs on a breadboard the other day. It only has 4 LEDs, but can easily be expanded to more:

It’s basically a simple display for showing a value. It’s originally for showing signal level in audio circuits, but there’s no reason you can’t use it to show temperature, rain intensity, light level, or whatever other value you are measuring.

Build Instructions: The Blinking Light Circuit

Do you want to build a circuit that blinks a light? This inverter-based circuit is simple, and it’s small enough to fit on a breadboard.

The circuit uses standard basic electronic components and you can build it even if you have never built anything before. Check out the full build instructions in the video below:


Scroll down to find the complete circuit diagram, component list, and step-by-step instructions (in text-form) on how to build this circuit.

Build an Atari Punk Console this evening

Do you want a fun and easy-to-build circuit? Here’s the simple, but fun Atari Punk Console – with schematics and parts list. It’s a quick build, so you can easily build it during an evening.

It takes its name from the old Atari computers of the 80s because it makes similar sounds.

And after my (not-so-intense) research (I basically just read about it on Wikipedia), I’ve come to learn that the circuit was first published in a Radioshack magazine in 1980.

Here’s a short clip of me playing with the circuit I built:

The circuit that makes sound

“The music that we are hearing is actually 8 seconds old”

That was my friend’s claim.

My friends and I were about 13 years old, and we heard loud music coming from a big event about 3 kilometers away.

“The speed of sound is 340 meters per second, and the event is 3 kilometers away. So that means what we are hearing now is actually what they played 8 seconds ago at the stadium” our friend told us.

I found it hard to accept because I didn’t know too much about sound and how it worked.

But our friend was really good at memorizing facts.

And he was right.

Blinking Christmas Lights

blinking-christmas-lights-finished

Christmas is coming up, so why not set aside an hour or two to build this blinking Christmas lights circuit?

This circuit is easy to build and it’s something you can put to use right away. I built this and hung it in the window, something my girlfriend loved!

The blinking part of the circuit is made up of only 4 components. Then you’ll add as many lights as you want.

Build The Knight Rider Light Bar Circuit With LEDs

The knight rider light bar circuit creates a running light similar to the light bar on the car from the television show Knight Rider.

It’s a really fun circuit to build. I once built a larger version of this for the inside of a party bus I was a part of. Unfortunately, I broke it the first day because I increased the voltage too much, but that’s another story.

You can build this circuit if you’re a total beginner, but of course, it’s a bit easier if you have already built a few circuits before.

Installing Whatsapp on Intel Galileo

Whatsapp on an Intel GalileoIn this tutorial I will show you how to install Whatsapp on your Intel Galileo. I’ll also show you how to read sensor data easily from your mobile phone through Whatsapp.

You can easily extend this into whatever you want, so that you can control your DIY electronics with your smart phone.

I used a Grove Soil sensor together with an Intel Galileo for this project. But you can use whatever sensor you want, as long as it connects to the ADC of your Intel Galileo.

DIY Weather Station with Intel Galileo

dht11-sensorYour own DIY weather station is very useful if you for example want to optimize the growing process of your plants.

It gives you the possibility of getting real-time data or statistics about things the soil moistness, or the temperature around your plants.

In this tutorial, I will show you how to build your own DIY weather station using the Intel Galileo and a few sensors.

Intel Galileo Board for Measuring Rain and Moist

intel galileo boardIn this Intel Galileo board sensors tutorial you’ll learn how to use analog sensors. I’ll show you how to use a simple rain sensor and a soil moisture sensor.

This project could be used on a farm: To make better decision about when to water the crops, it’s very helpful to have information about how much it has rained, and the moisture level in the soil.

Even though I used an Intel Galileo here, you could just as well use the same code and connections with an Arduino.

The components I used: