In this guide, you’ll learn how to set up an Arduino IR Transmitter circuit. It lets you control an IR (Infrared) LED and send any remote control code from your Arduino. This means you can use it to control your TV or anything else you feel like!
This tutorial focuses on just setting up an IR transmitter. If you want to read codes from a remote control, check out our Arduino IR Receiver tutorial. Or the Arduino Remote Control tutorial for a complete guide to building a remote control.
The Circuit
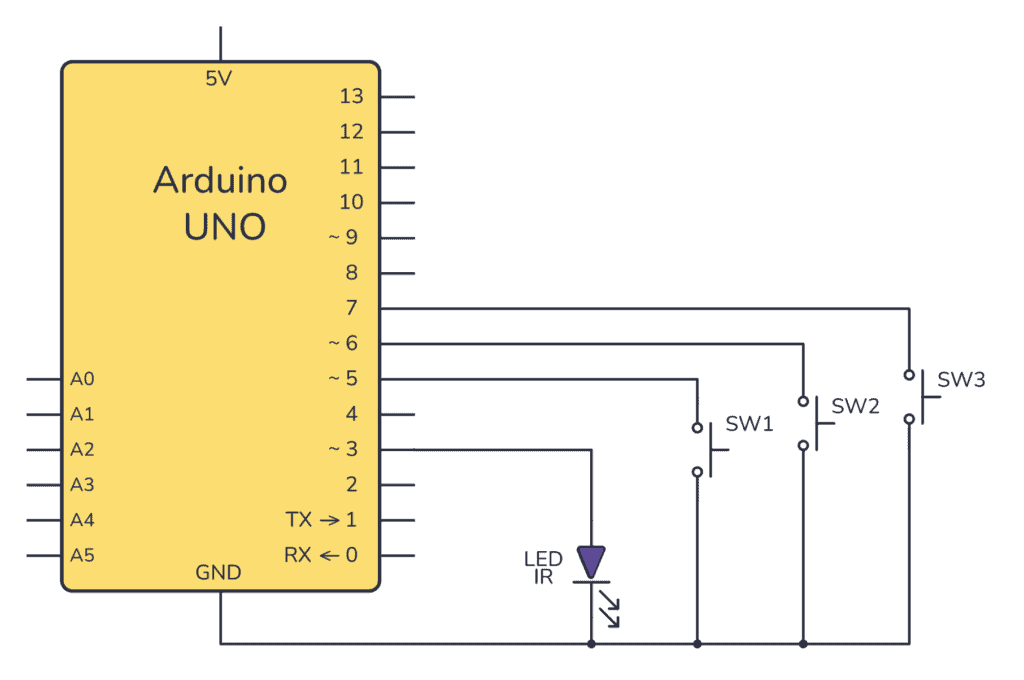
The circuit is pretty straightforward. Three buttons and an IR LED are connected to an Arduino. We’ll set up the pins D5-D7 with internal pullup resistors to avoid having to add them ourselves.
How It Works
The Arduino UNO reads the state of three buttons. When a button is pressed, the Arduino uses the IRremote library to transmit a unique hexadecimal code encoded as an IR signal through the IR LED. Different codes can be assigned to each button press, allowing for communication of specific instructions to an IR receiver.
Parts List
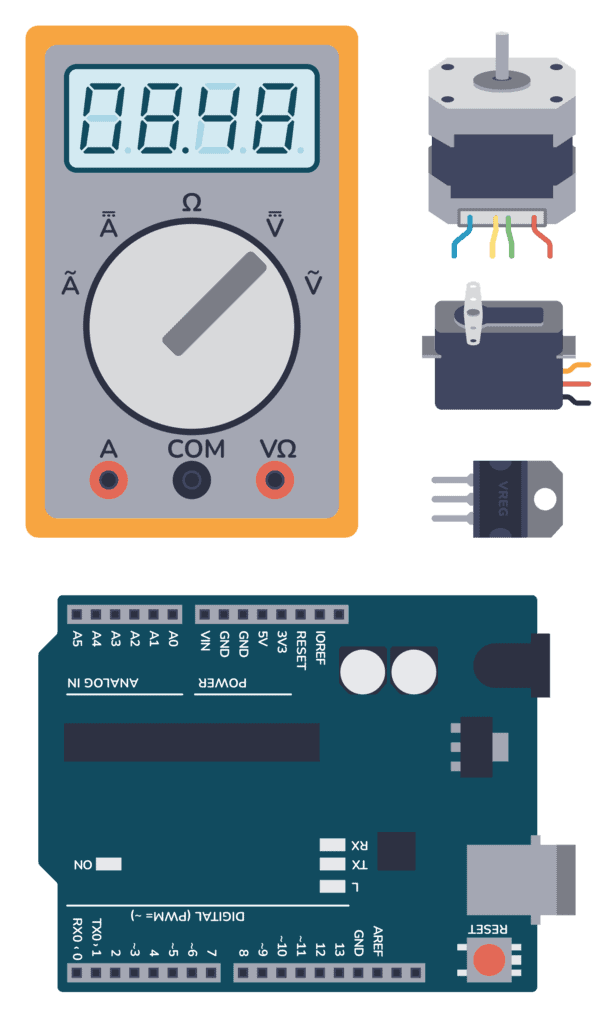
- Arduino
- IR LED (Light-Emitting Diode)
- 3 x Pushbuttons
- Breadboard
Building the Circuit
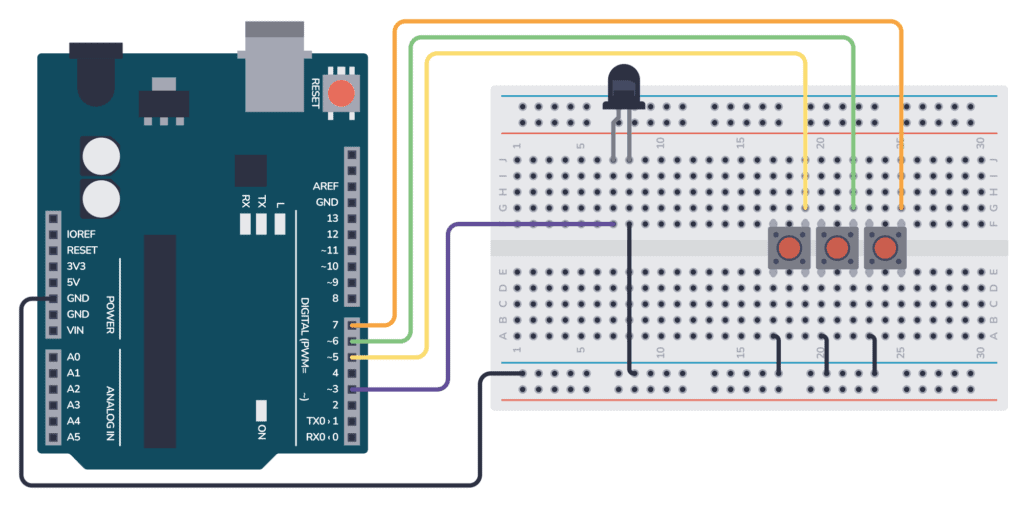
Connect each push-button switch to its respective pin (5, 6, or 7) on the Arduino board using jumper wires. Connect one side of each switch to the Arduino digital input pins and the other side to ground.
Next, connect the anode of the IR LED to digital pin 3 of the Arduino and the cathode to the ground. An IR LED is connected similarly to a regular LED, but it operates with invisible infrared light.
In the image below, you can see a suggestion for how to connect your IR LED and the pushbuttons to your Arduino with a breadboard.
Upload the Code
Copy the following code to your Arduino IDE. This code initializes the IR transmitter and sets up the push buttons. When a button is pressed, a unique IR code is sent out.
Basic Electronics for Arduino Makers
Learn the basics that every Arduino maker should know, and it'll open you up to a world of possibilities! Sign up for my circuit tips by email and I'll send you the eBook:
Here I’ve chosen a few random remote control codes. If you want to copy some codes of an existing remote, check out the Arduino IR Receiver example on how to do that.
// Using the IRremote library: https://github.com/Arduino-IRremote/Arduino-IRremote
#include <IRremote.h>

IRsend irsend;

void setup() {
  Serial.begin(9600);
  pinMode(5, INPUT_PULLUP); // SW1 connected to pin 2
  pinMode(6, INPUT_PULLUP); // SW2 connected to pin 3
  pinMode(7, INPUT_PULLUP); // SW3 connected to pin 4
  // The IR LED is connected to pin 3 (PWM ~) on the Arduino
}

void loop() {

  if (digitalRead(5) == LOW) { // When SW1 is pressed
    irsend.sendNEC(0x34895725, 32);  // Replace with your own unique code
    Serial.println("Code sent!");
    delay(30);
  }

  else if (digitalRead(6) == LOW) { // When SW2 is pressed
    irsend.sendNEC(0x56874159, 32); // Replace with your own unique code
    Serial.println("Code sent!");
    delay(30);
  }

  else if (digitalRead(7) == LOW) { // When SW3 is pressed
    irsend.sendNEC(0x15467823, 32); // Replace with your own unique code
    Serial.println("Code sent!");
    delay(30);
  }

  else {
    Serial.println("Nothing to send");
    delay(30);
  }

  delay(100);
}
Test Your Arduino IR Transmitter
After uploading the code to your Arduino, press each button and check the Serial Monitor. You should see “Nothing to send” until a button is pressed, at which point the corresponding IR code will be sent.
Make sure you point the IR LED toward the device you want to control.
Troubleshooting Tips:
- Make sure your IR LED is connected to the correct pin and is oriented correctly with the positive and negative leads.
- Ensure there are no loose connections on the breadboard and that all wires are fully inserted into the correct breadboard holes and Arduino pins.
- If the buttons don’t seem to be working, check that they are wired with the correct polarity and that the
INPUT_PULLUPmode is set correctly in the code.
By following these instructions, you should have a functional IR transmitter controlled by an Arduino. This can be used for various projects, including remote controls, interactive installations, and more. Remember to replace the unique codes in the irsend.sendNEC() function with codes that correspond to your device.
If you’re not sure which codes you need, check out our Arduino Remote Control project.
Have questions or suggestions? Drop a comment below, and help us improve these resources!
More Arduino Tutorials
Basic Electronics for Arduino Makers
Learn the basics that every Arduino maker should know, and it'll open you up to a world of possibilities! Sign up for my circuit tips by email and I'll send you the eBook: