In this tutorial, I am going to show you exactly how to make an Arduino remote control. You can use this project to combine functions from different remote controls and make your super-awesome dream remote control!
If you are not familiar with Arduino, check out What is Arduino and Where to start?
A remote control sends out an infrared (IR) code when you push a button. The gadget you point the remote control at will receive this IR code. To make your own Arduino remote control, you need to first copy the IR code from an existing remote control using an IR receiver.
To create our remote control we need to:
- Get the button code from the original remote
- Make a remote-control program
- Upload our program to the Arduino
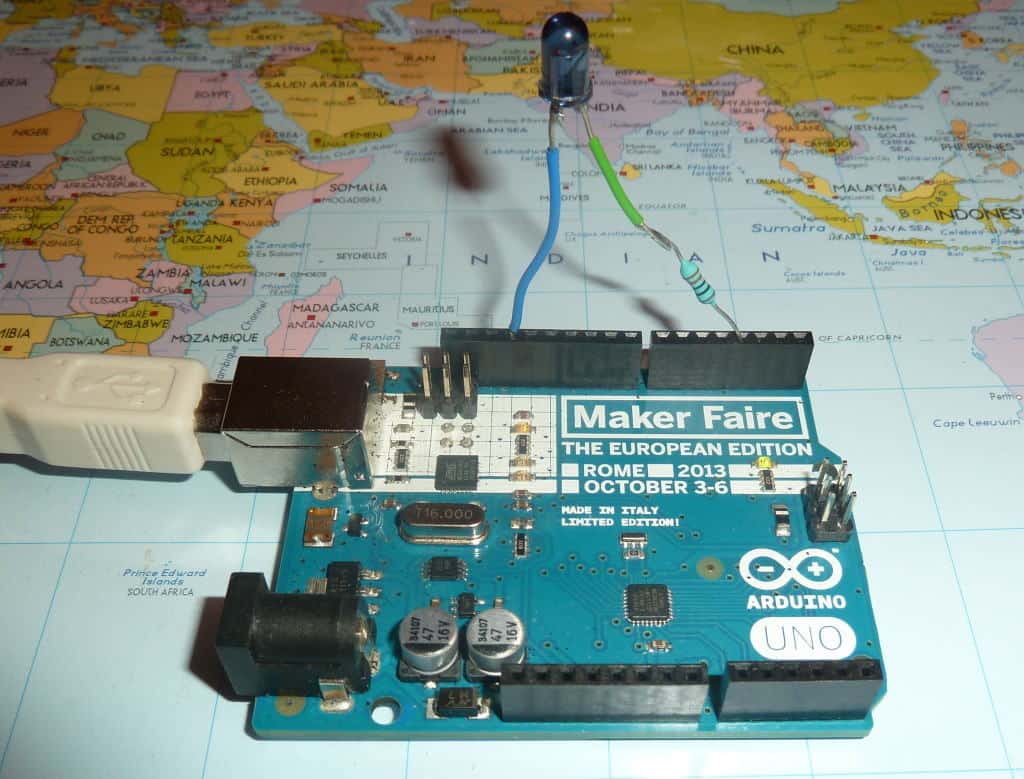
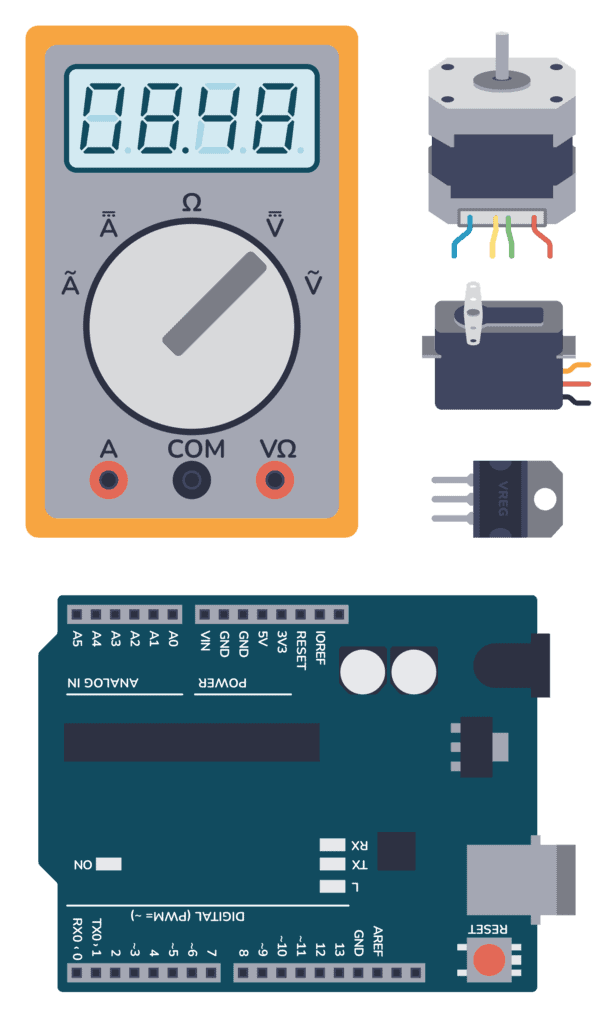
We will use these components for our Arduino project:
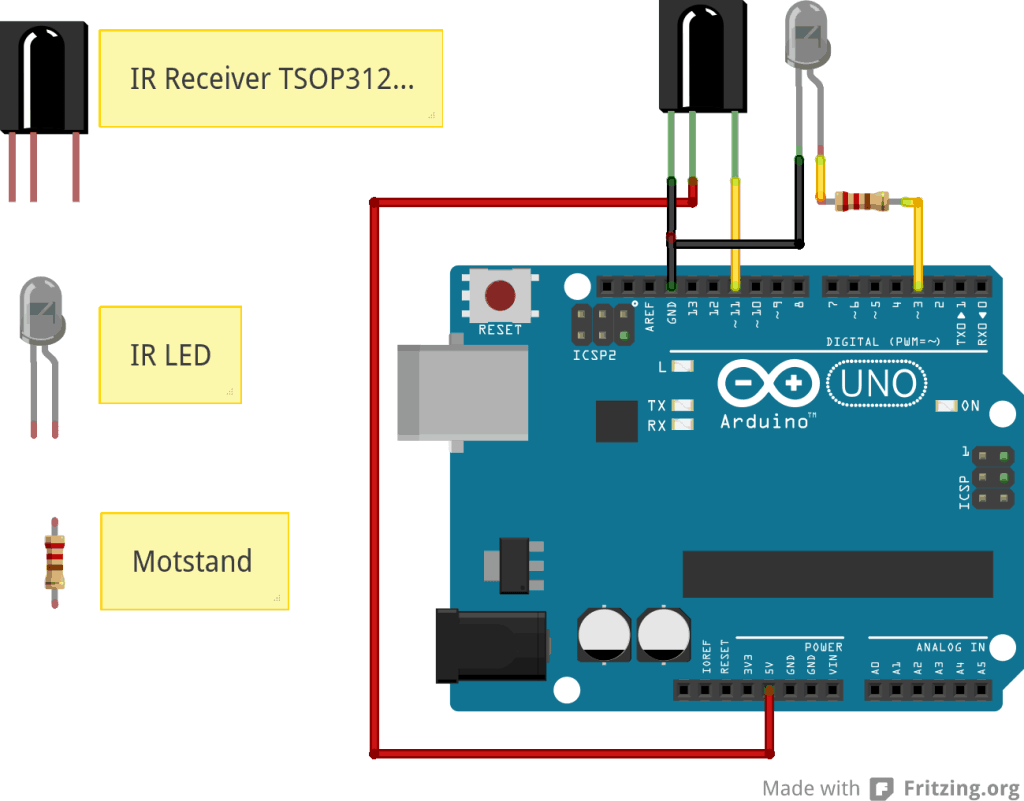
Connect the hardware
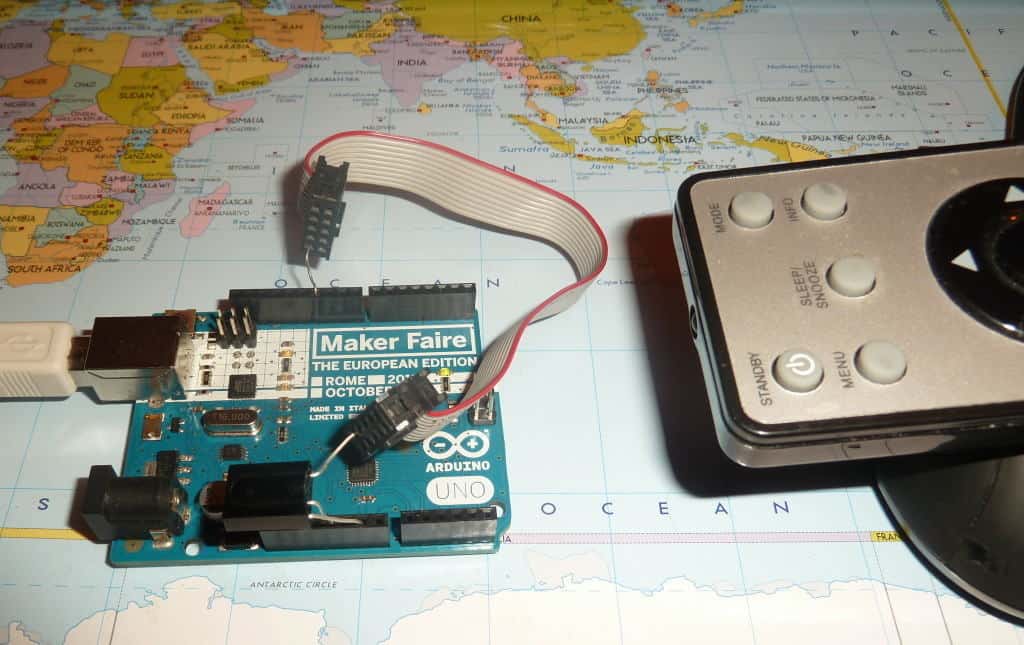
We start by connecting the components to the Arduino. The IR receiver is a photodiode packaged with a filter and amplifier to make it easy to detect remote control signals. Here is how to connect the components:
Get the Arduino-IRremote library
In this tutorial, we will use the Arduino-IRremote library. It is open-source and can be found at https://github.com/shirriff/Arduino-IRremote
We’ll download and install the library as described on their website. It’s basically just to download a zip file, unzip it and rename it. Then put it in the arduino/library/ folder.
Basic Electronics for Arduino Makers
Learn the basics that every Arduino maker should know, and it'll open you up to a world of possibilities! Sign up for my circuit tips by email and I'll send you the eBook:
This library includes everything we need to receive and send IR signals.
Retrieve the button code and protocol
First, we need to get the button code and protocol from the original remote.
In this tutorial we will copy the “Standby”-button from a Sandstrøm radio remote control.
To receive the IR code, we will use the IRrecvDemo example. You’ll find it in the example folder of the Arduino-IRremote folder (…/arduino/libraries/IRremote/examples/IRrecvDemo/IRrecvDemo.ino)
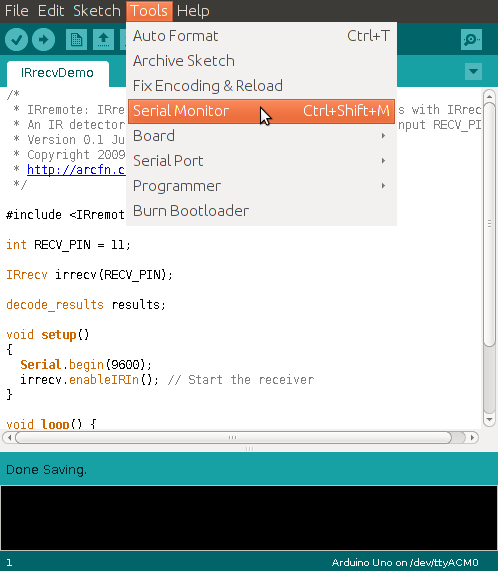
This example prints the code it receives. But we also want to know which protocol it uses. So we’ll modify the program slightly. We’ll add these two lines to the program:
Serial.print(“Protocol: “);
Serial.println(results.decode_type, DEC);
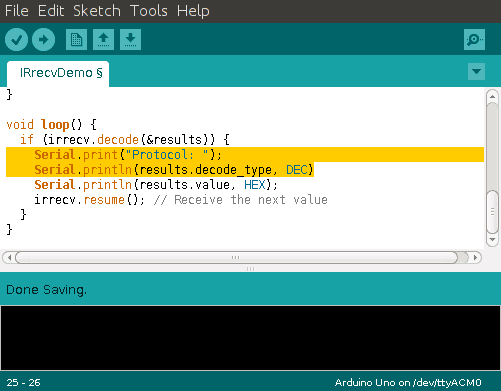
We’ll verify and upload our program to Arduino.
Then we open the Serial Monitor tool from the Tools menu.
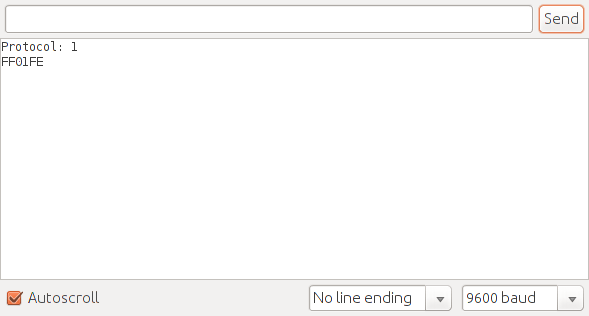
We point our remote control to the IR receiver and push the “Standby”-button one time.
When we push the button, a code appears on the serial monitor. If we hold the button we will see several codes. But we’ll push only once and note the code that we receive.
To figure out which protocol our remote is using we need to check out the IRremote.h file (…/arduino/libraries/IRremote/IRremote.h):
// Values for decode_type
#define NEC 1
#define SONY 2
#define RC5 3
#define RC6 4
#define DISH 5
#define SHARP 6
#define PANASONIC 7
#define JVC 8
#define SANYO 9
#define MITSUBISHI 10
#define UNKNOWN -1
We received a “1” as protocol. That means our remote control is using the NEC protocol.
Create a program using the protocol and button-code
Ok, we got the button code.
Now we will make a program so that we can send the code through the IR diode. Luckily, there is already an example in the Arduino-IRremote library that shows us how to do that.
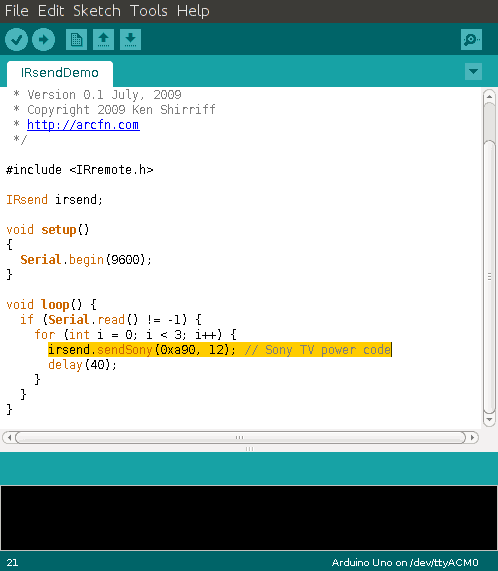
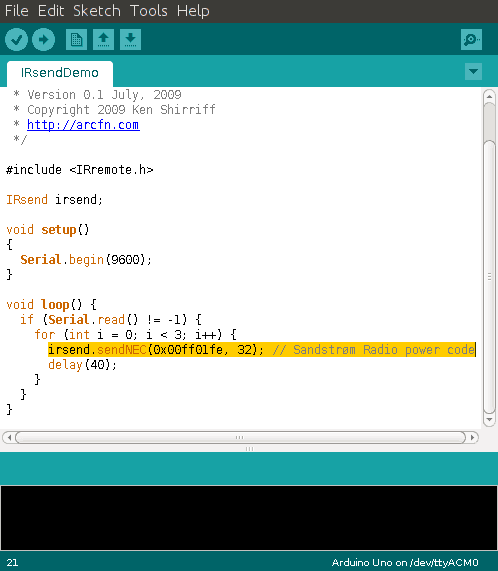
Find the IRsendDemo file and open it (…/arduino/libraries/IRremote/examples/IRsendDemo/IRsendDemo.ino)
The program waits until it receives a character on the serial port. Then sends the IR code.
We scroll down to where the IR code is sent:
Now we need to do some modifications.
In the example file, they are using the Sony protocol. But our Arduino remote control uses the NEC protocol (as we found above). So we need to find the right function to use for the NEC protocol.
To find the correct function to use for our protocol, we open up the IRremote.h file (…/arduino/libraries/IRremote/IRremote.h) and search for “class IRsend”. Here, we’ll see a bunch of different send methods in the class definition.
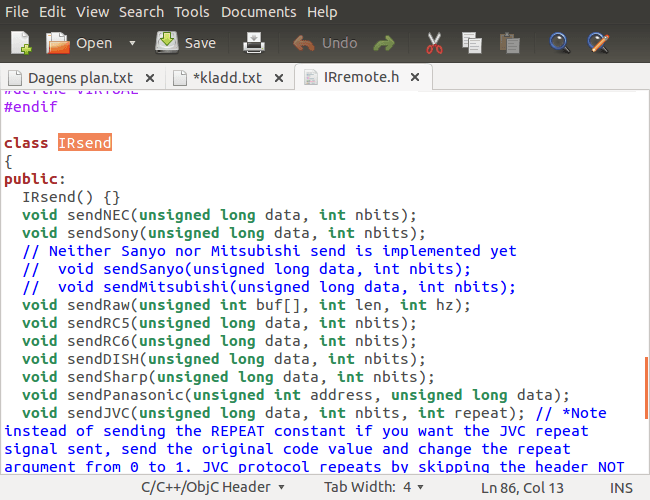
In our case, we need the function for the NEC protocol, so we choose the sendNEC() function.
Back in the program code we change from sendSony to sendNEC. Using the NEC protocol we need to send 32 bits. So we change the number of bits to 32.
Then we take the button code that we found, FF01FE, and copy it into the program:
Now, let’s verify and upload the sketch to our Arduino.
Test the Arduino Remote Control
It is time to test our Arduino remote control.
We open the Serial Monitor again. Then point the IR diode to the radio. We type in a character in the Serial Monitor and push the “Send” button.
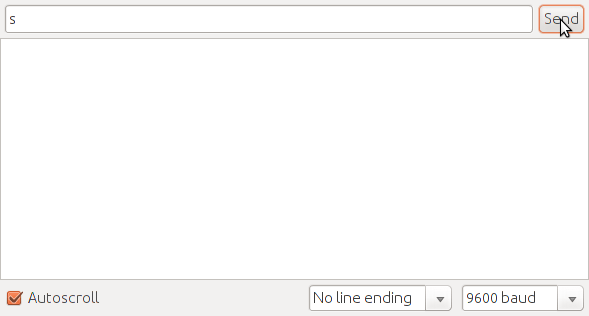
And our radio magically turns on =) We have made an Arduino remote control!
More Arduino Tutorials
Basic Electronics for Arduino Makers
Learn the basics that every Arduino maker should know, and it'll open you up to a world of possibilities! Sign up for my circuit tips by email and I'll send you the eBook:
When will your book be out and will it be available as an e-book and about what price range will it be in.
Hey, I wish I could say for sure, but I don’t know. But I will announce it on my blog and newsletter when I know.
Hey Arnold! Finally I have a release date: 17th of June 2014. It will be available from this page: https://www.build-electronic-circuits.com/products/getting-started-with-electronics/
Cheers!
Oyvind
you could show you a code to use the arduino as an infrared extender?
sorry I’m a beginner
Good suggestion! I don’t have that at the moment, but I might try it out later.
Cheers!
Oyvind
I wrote ir send code like this,
#include
IRsend irsend;
void setup()
{
Serial.begin(9600);
}
void loop() {
if (Serial.read() != -1) {
for (int i = 0; i < 3; i++) {
irsend.sendSony(0xa90, 12); // Sony TV power code
delay(40);
}
}
}
but its not working,what is the error that codes?
What is not working?
Oyvind
Hello.
(Sorry for my english)
First of all thanks for the excellent guide!
I have a problem when I try to send IR code by pressing a button. For example when I try to change the condition:
if (Serial.read ()! = -1)
to condition like:
if (buttonState == HIGH)
The problem is that the output I get is of three types:
E7A14960 or FFFFFFFF or FF01FE
And of course I would like to get only FF01FE
Can you help me to solve this problem?
My code:
#include
IRsend irsend;
const int buttonPin = 9;
int buttonState;
void setup()
{
Serial.begin(9600);
pinMode(buttonPin, INPUT);
}
void loop() {
buttonState = 0;
buttonState = digitalRead(buttonPin);
if (buttonState == HIGH)
{
for (int i = 0; i < 3; i++)
{
irsend.sendNEC(0x00FF01FE, 32);
delay(40);
}
}
}
Thank you!
Hey adi,
This might be a debounce problem.
Read more here: http://arduino.cc/en/Tutorial/Debounce
Cheers!
Oyvind
what should i do if have an unknown manufacturer?
I haven’t come across that problem, but I’m guessing you have to use the sendRaw function.
Cheers!
Oyvind
Hello
I have a problem. I don’t have remote.h in my arduino 1.6.5
Please help me
Did you install the Arduino-IRremote as explained in the article?
Oyvind
help me for following error message
Arduino: 1.6.3 (Windows 7), Board: “Arduino Uno”
C:Program FilesArduinolibrariesRobotIRremotesrcIRremoteTools.cpp:5:16: error: ‘TKD2’ was not declared in this scope
int RECV_PIN = TKD2; // the pin the IR receiver is connected to
^
Multiple libraries were found for “IRremote.h”
Used: C:Program FilesArduinolibrariesRobotIRremote
Not used: C:UsersApaDocumentsArduinolibrariesArduino-IRremote-master
Not used: C:Program FilesArduinolibrariesIRremote
Error compiling.
This report would have more information with
“Show verbose output during compilation”
enabled in File > Preferences.
Hey,
check the comments here: https://github.com/z3t0/Arduino-IRremote/issues/98
Cheers!
Oyvind
Just a note: You should change “motstand” to “resistor” in the hw setup illustratoins
Hello Every1. Found sumthng new reated to the same.
http://vaaiibhav.me/how-to-use-arduino-with-infrared-remote-control/
Hello lm urgently looking for someone who could develop a remote control with weight function, button up/down and security code.
More information will be provided on the later stage.
Please help l have funds available now…
Check out upwork.com or similar sites. Should be plenty of people that can help you there.
Good luck!
Oyvind
Total newbie here.
I was able to retrieve the codes successfully but I’m having trouble getting the transmitter to send a signal.
When I run IRsendDemo on a 5 second loop and watch the LED through my phone camera it doesn’t light up but when I run the Blink program through pin 3 I can see it just fine.
Also, ultimately I plan to send RC5 codes. Is that also 32 bits and do I still need to include “0x00” before the code I retrieved?
Thanks for any insight you can provide.
All working!!
1)turns out Leonardos use pin13 for irLibrary, not 3
2)even though my receiver told me my remote was protocol 3, Miccas actually use NEC so 32 bits it is
3)working fine with just the “0x” before the code