 In this tutorial I will show you how to install Whatsapp on your Intel Galileo. I’ll also show you how to read sensor data easily from your mobile phone through Whatsapp.
You can easily extend this into whatever you want, so that you can control your DIY electronics with your smart phone.
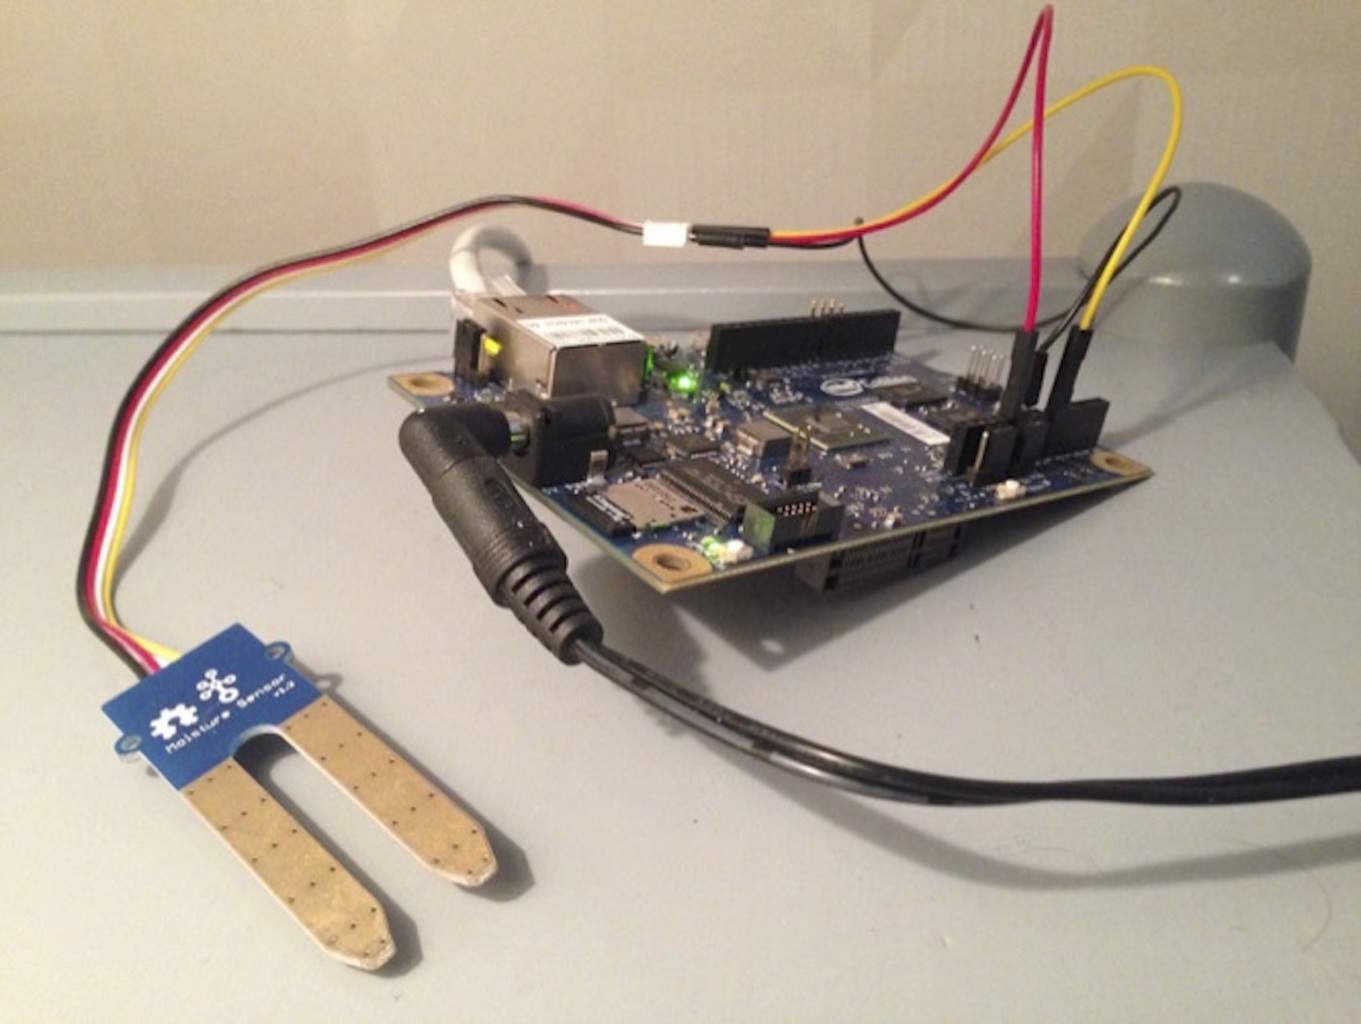
I used a Grove Soil sensor together with an Intel Galileo for this project. But you can use whatever sensor you want, as long as it connects to the ADC of your Intel Galileo.
Step 1: Connect the hardware
First you need to connect the hardware. Connect the sensor like this:
- Connect your Soil Moisture sensor to your Galileo.
- Connect VCC to the 5V output on the Galileo and the GND to the GND.
- Connect the SIG from the sensor the A0 input on the Galileo.
Then connect your Galileo to a router with Internet access via WiFi or Ethernet cable. And connect your computer to the same network.
Now you need to find the IP address of your Galileo. You can do this by logging into your router’s admin page and check the list of connected devices.
If you don’t know how to do that — or if you’re not able to — you can find more ideas on finding the IP of your Intel Galileo here.

Build Something Useful This Evening
This gadget lets you use any IR remote-control to control your lamp, garden lights, heater oven, garage door, or anything else.
Step 2: Download yowsup
For this and some of the following steps you will need to use the two commands ‘scp’ and ‘ssh’. For Linux and Mac, you can simply run these commands from a terminal window. For Windows, check out this article on how to use these.
On your computer, download the yowsup zip file from https://github.com/tgalal/yowsup
Then unzip the folder.
Next, copy the extracted yowsup folder to your Intel Galileo using ‘scp’.
If you are using Mac or Linux, just open a terminal and run the following command (replace ‘Download/yowsup-master’ with the path to the folder you just extracted and replace ‘192.168.1.90’ with the IP of your Galileo):
scp -r Downloads/yowsup-master [email protected]:~/
Step 3: Install yowsup
First, log into your Galileo using ssh.
If you’re using Linux or Mac, go to the terminal and type the following (replace ‘192.168.1.90’ with the IP of your Galileo):
ssh [email protected]
Then go into the ‘yowsup-master’ folder:
cd yowsup-master
Now you can install yowsup with this command:
python setup.py install
NOTE: This step requires your Galileo to have an Internet connection, and it will take a while. When I did it, it took about 40 minutes to complete.
Step 4: Register yowsup with your phone number
You need a phone number for this step.
And it needs to be a different one from the one you have on the mobile you plan to use to communicate with your Intel Galileo. You’re not allowed to have the same number on two devices.
It’s possible to find numbers online that you can use for this purpose.
I tried that.
But after trying and failing with that for 30 minutes, I decided to just call my dad and ask if I could use his number.
He was happy to help. He doesn’t use whatsapp anyway.
If you don’t have any friends or family that will borrow you their number, you can also buy the cheapest prepaid SIM card you can find to get yourself a number for this purpose.
Note: The whatsapp service is free the first year. Then it costs about $1 a year. If you are past your free year and haven’t paid, this step will charge you (or your father) that dollar.
Finding your Mobile Country and Network code
Now that you have a phone number to use you need to do two things:
- Request a code by sms
- Verify with the received code
You do both of these steps with the ‘yowsup-cli registration’ command.
This command requires you to specify:
- cc: Country code. See http://www.ipipi.com/help/telephone-country-codes.htm
- phone: Your phone number including the country code, without preceeding ‘+’ or ’00’
- mcc: Mobile Country Code. Find your mcc here: https://en.wikipedia.org/wiki/Mobile_country_code
- mnc: Mobile Network Code. Find your mnc here https://en.wikipedia.org/wiki/Mobile_country_code
Receiving code and verifying
First request a code on sms using the following command. Replace with your phone number, cc, mcc and mcn:
yowsup-cli registration --requestcode sms --phone 49XXXXXXXX --cc 49 --mcc 123 --mnc 456
You should now receive an SMS with a verification code. Run the following command. Replace with your verification code, phone number and cc:
yowsup-cli registration --register 123456 --phone 49XXXXXXXX --cc 49
If everything is ok, you’ll receive a message like this:
status: ok
kind: free
pw: yOuRpAsSwOrD
price: 7,00 kr
price_expiration: 1856290999
currency: NOK
cost: 7.00
expiration: 138974937
login: 49XXXXXXXX
type: existing
Pay attention to pw and login:
- login is the phone number you registered with
- pw is the password you need to use the service
Save your password somewhere so you can easily find it later on.
Step 5: Test yowsup
Now you’re ready to test if it’s working!
You’ll need your login and password from the previous step.
Set up an echo server by running the following command (replace 49XXXXXXXX with your login and yOuRpAsSwOrD with your password):
yowsup-cli demos -l 49XXXXXXXX:yOuRpAsSwOrD --echo
Then send a whatsapp message from your phone to the number you setup with Intel Galileo. Whatever you send will be sent back to you from the Galileo:

Note: If I waited for too long without sending anything after executing the yowsup-cli command above, it failed with some errors. If it fails, just restart it.
Step 6: Getting sensor data
Now, let’s see if you can get the sensor data through Whatsapp.
First of all – figuring out how to create custom applications with yowsup was a bit difficult… The documentation was not aimed at outsiders apparently. But I was able to create an echo application and understand a little bit by following the instructions from this article.
And I learned how to access the Analog to Digital Converter from within Python, so that I could read sensor values, from this article.
So, I hacked the Sample Application into doing what I wanted.
To get the application running, you need the files run.py and layer.py. Create a folder for them on your Galileo. Then run the application on your Galileo by executing the command:
python run.py
layer.py:
from yowsup.layers.interface import YowInterfaceLayer, ProtocolEntityCallback
from yowsup.layers.protocol_messages.protocolentities import TextMessageProtocolEntity
from yowsup.layers.protocol_receipts.protocolentities import OutgoingReceiptProtocolEntity
from yowsup.layers.protocol_acks.protocolentities import OutgoingAckProtocolEntity

import mraa # For access to ADC

class EchoLayer(YowInterfaceLayer):

@ProtocolEntityCallback("message")
def onMessage(self, messageProtocolEntity):
#send receipt otherwise we keep receiving the same message over and over

if True:
receipt = OutgoingReceiptProtocolEntity(messageProtocolEntity.getId(), messageProtocolEntity.getFrom(), 'read', messageProtocolEntity.getParticipant())

if messageProtocolEntity.getBody() == 'sensor0':
# Set up the ADC on pin 0
adc = mraa.Aio(0)
# Read the ADC value
value = adc.read()
replyBody = "Sensor 0 value: " + str(value)
elif messageProtocolEntity.getBody() == 'sensor1':
# Set up the ADC on pin 1
adc = mraa.Aio(1)
# Read the ADC value
value = adc.read()
replyBody = "Sensor 1 value: " + str(value)
else:
replyBody = "Unknown command: " + messageProtocolEntity.getBody()

outgoingMessageProtocolEntity = TextMessageProtocolEntity(
replyBody,
to = messageProtocolEntity.getFrom())

self.toLower(receipt)
self.toLower(outgoingMessageProtocolEntity)

@ProtocolEntityCallback("receipt")
def onReceipt(self, entity):
ack = OutgoingAckProtocolEntity(entity.getId(), "receipt", entity.getType(), entity.getFrom())
self.toLower(ack)
run.py:
from layer import EchoLayer
from yowsup.layers.auth import YowAuthenticationProtocolLayer
from yowsup.layers.protocol_messages import YowMessagesProtocolLayer
from yowsup.layers.protocol_receipts import YowReceiptProtocolLayer
from yowsup.layers.protocol_acks import YowAckProtocolLayer
from yowsup.layers.network import YowNetworkLayer
from yowsup.layers.coder import YowCoderLayer
from yowsup.stacks import YowStack
from yowsup.common import YowConstants
from yowsup.layers import YowLayerEvent
from yowsup.stacks import YowStack, YOWSUP_CORE_LAYERS
from yowsup import env

from yowsup.layers.axolotl import YowAxolotlLayer

# replace with your phone and password
CREDENTIALS = ("49xxxxxxxx", "jkEhj6S2}nR62HHds]ii=")
if __name__== "__main__":
layers = (
EchoLayer,
(YowAuthenticationProtocolLayer, YowMessagesProtocolLayer, YowReceiptProtocolLayer, YowAckProtocolLayer),
YowAxolotlLayer,
) + YOWSUP_CORE_LAYERS

stack = YowStack(layers)
stack.setProp(YowAuthenticationProtocolLayer.PROP_CREDENTIALS, CREDENTIALS) #setting credentials
stack.setProp(YowNetworkLayer.PROP_ENDPOINT, YowConstants.ENDPOINTS[0]) #whatsapp server address
stack.setProp(YowCoderLayer.PROP_DOMAIN, YowConstants.DOMAIN)
stack.setProp(YowCoderLayer.PROP_RESOURCE, env.CURRENT_ENV.getResource()) #info about us as WhatsApp client

stack.broadcastEvent(YowLayerEvent(YowNetworkLayer.EVENT_STATE_CONNECT)) #sending the connect signal

stack.loop() #this is the program mainloop
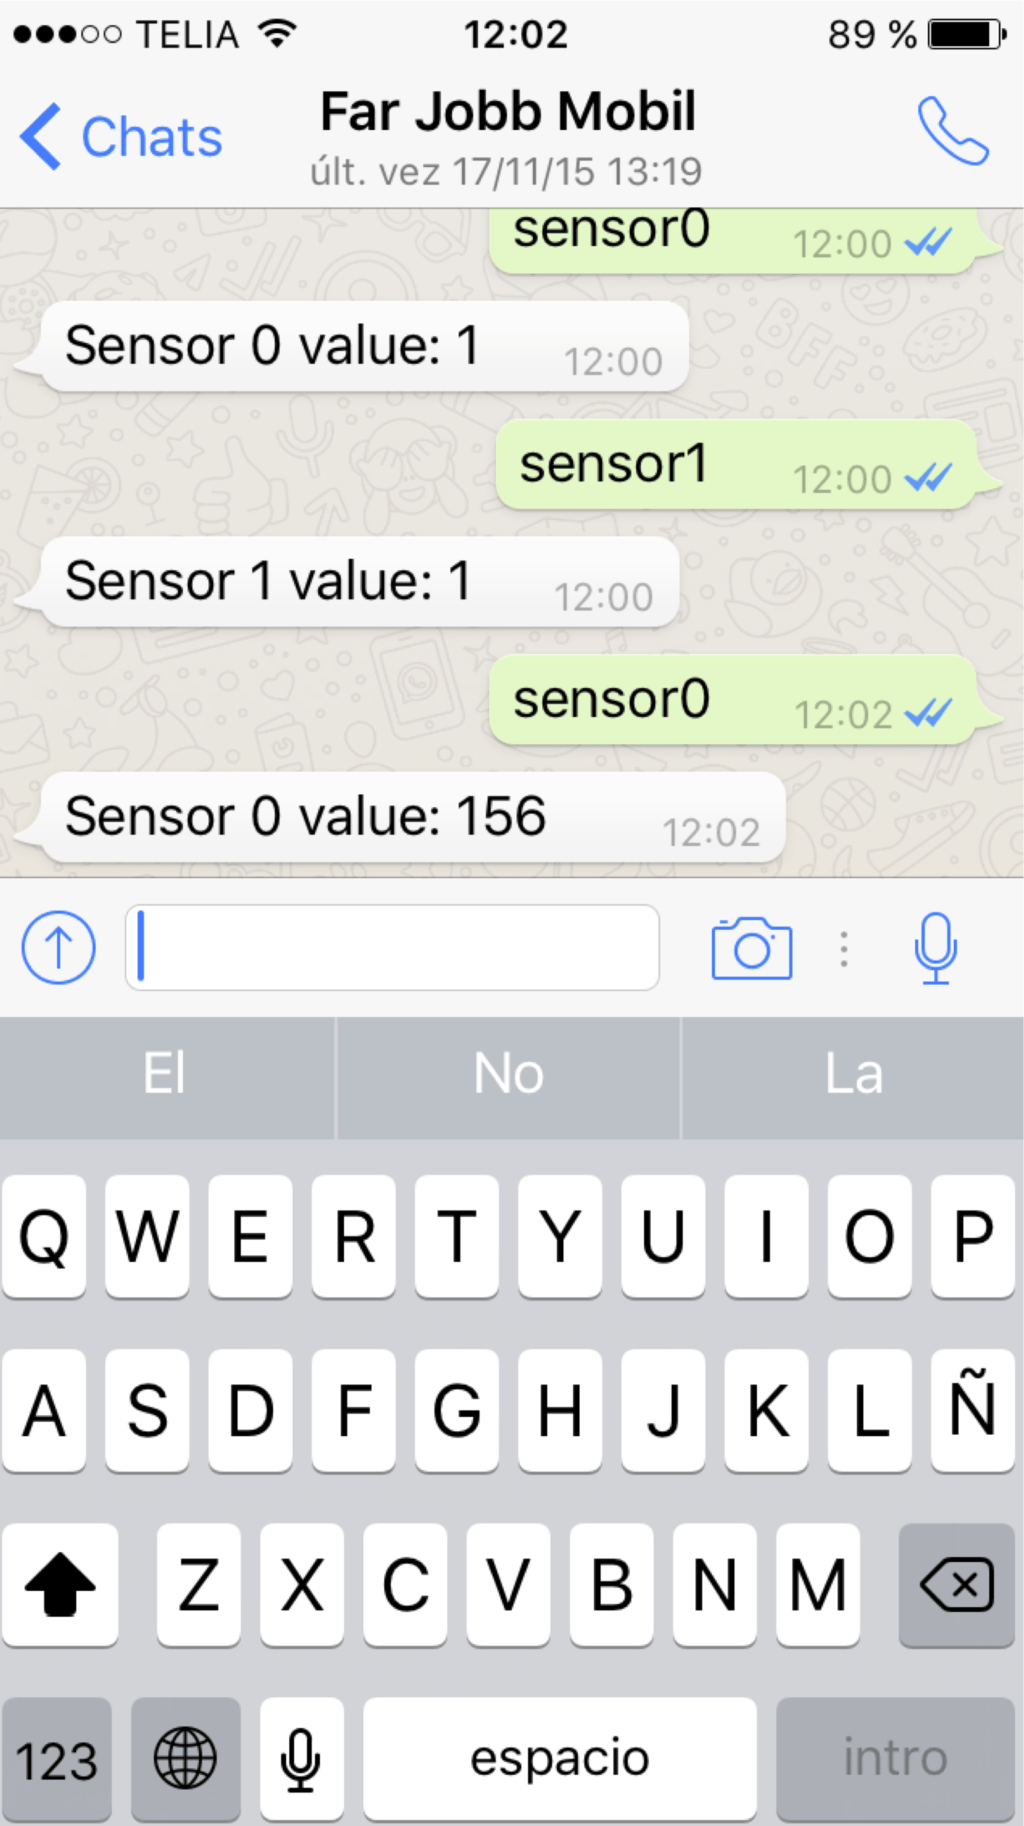
Testing Whatsapp on Intel Galileo
With the Whatsapp application running, I can send either the message “sensor0” or “sensor1” to read the sensor values from either analog port 0 or analog port 1.
Yiiiha!
Check out more of my Intel Galileo projects here
More Circuits & Projects Tutorials

Build Something Practical This Evening
Download this tutorial that shows you step by step how to build an old-school USB charger for your mobile.

