This is a timer project I recently made.
I am really into productivity techniques and I think using the Pomodoro technique is a nice way of working when you need to be productive.
You work hard for 25 minutes, then take a 5 minute break.
Also, I have found that the sound of a gong makes me really relaxed and focused. So I decided to build a timer project with a gong.
I wanted the gong to “gong” at the start to make me focus, then “gong” at the end to make me relax during the break.
Components for the timer project
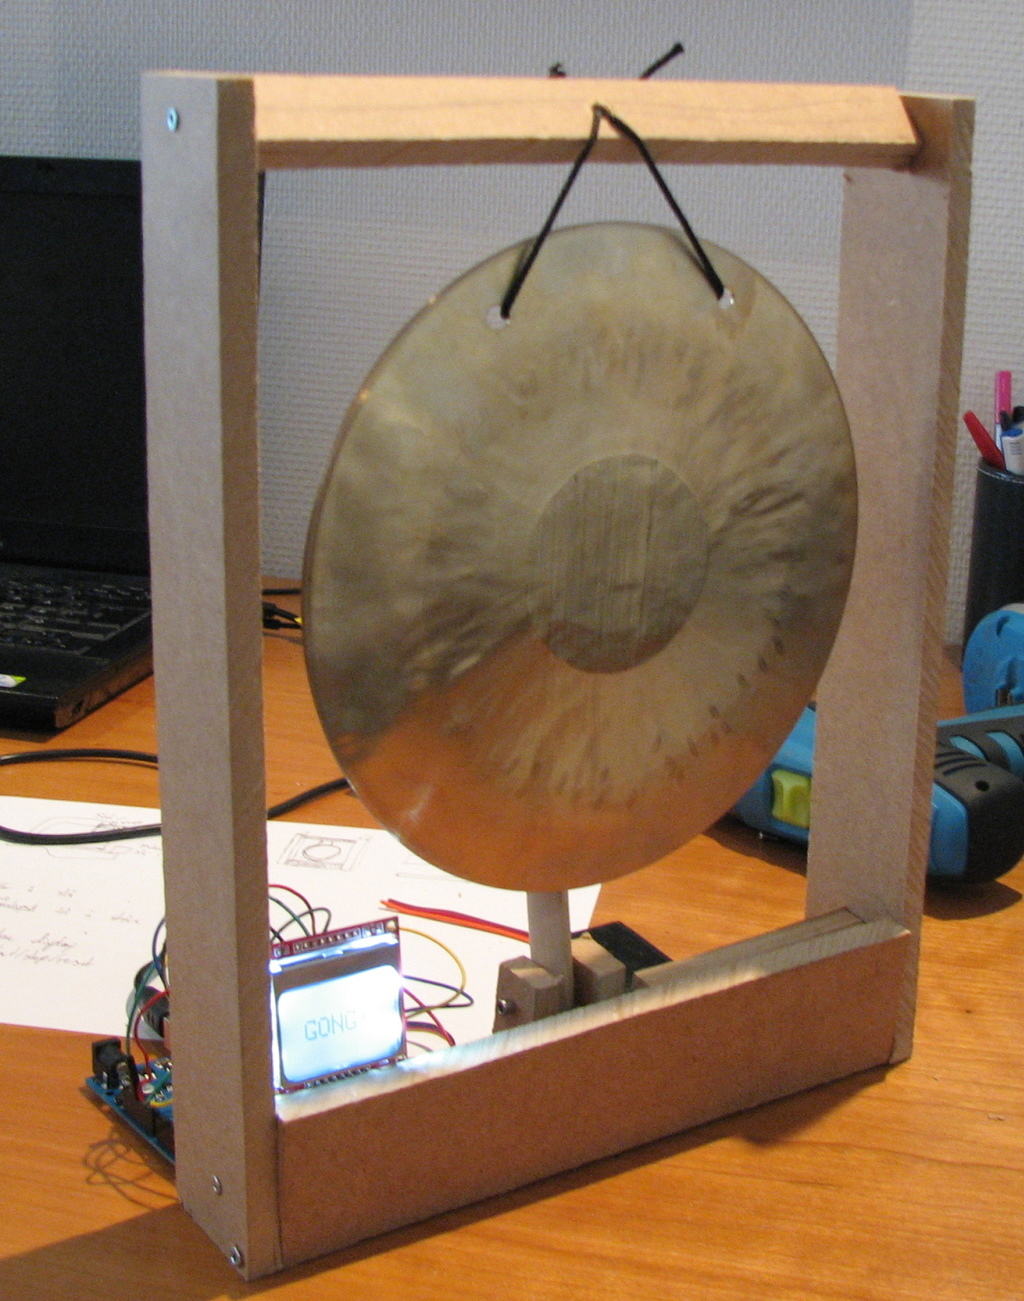
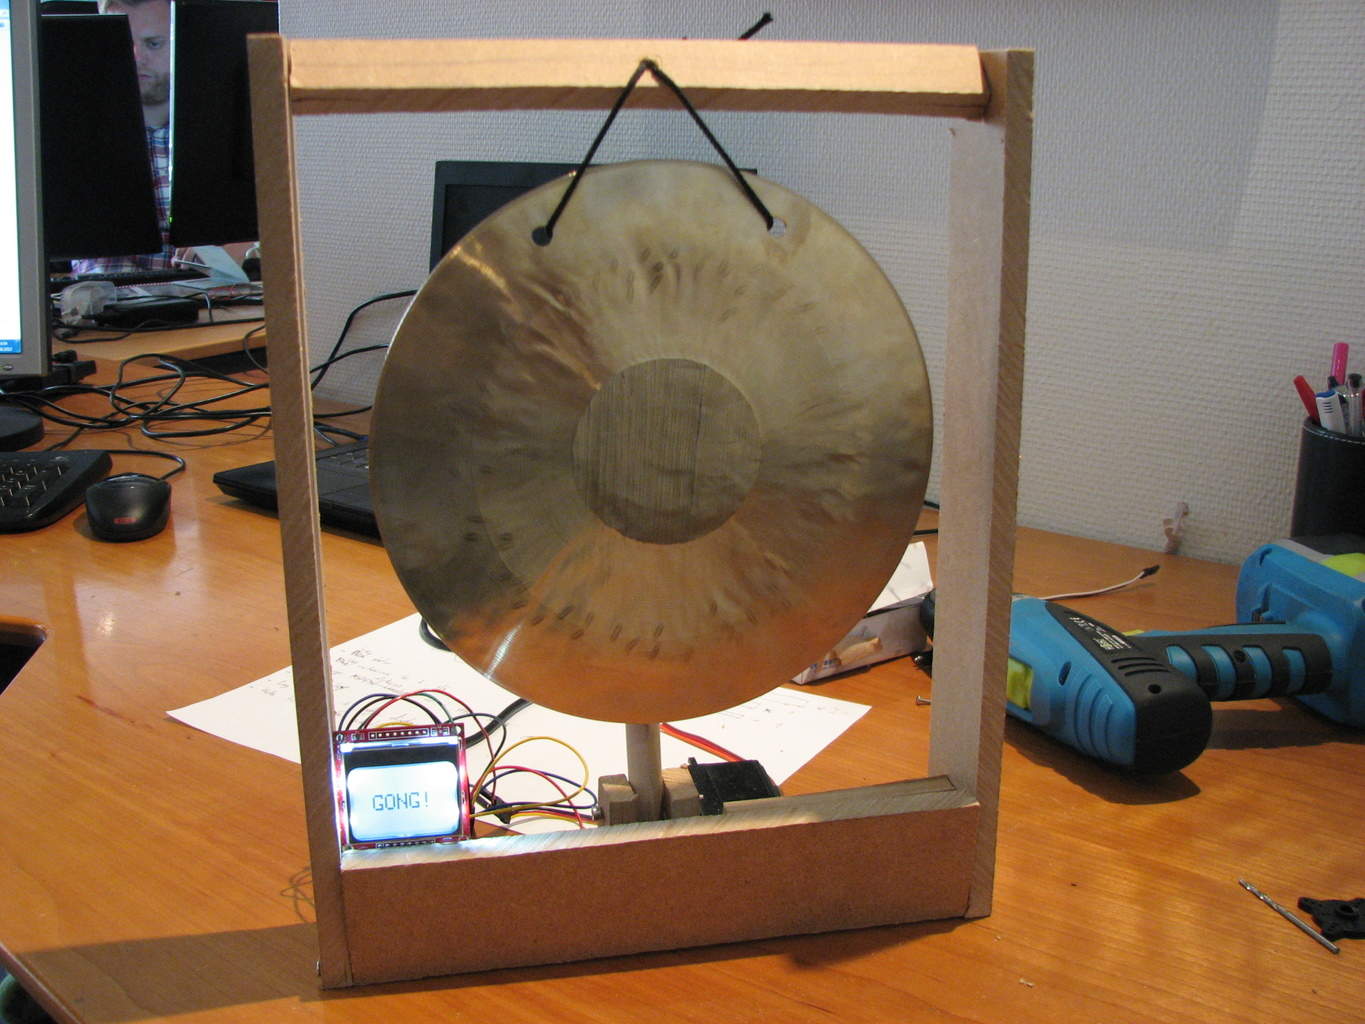
I bought a gong and a mallet from Gongs Unlimited.

Build Something Practical This Evening
Download this tutorial that shows you step by step how to build an old-school USB charger for your mobile.
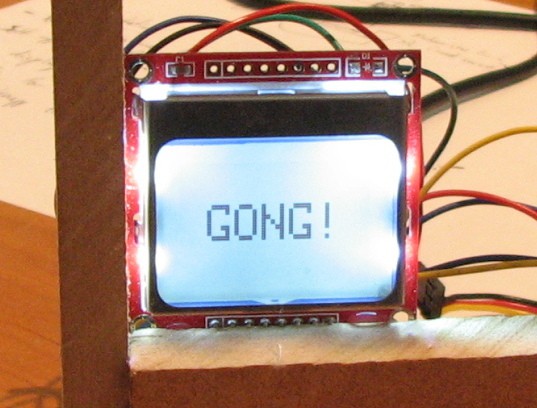
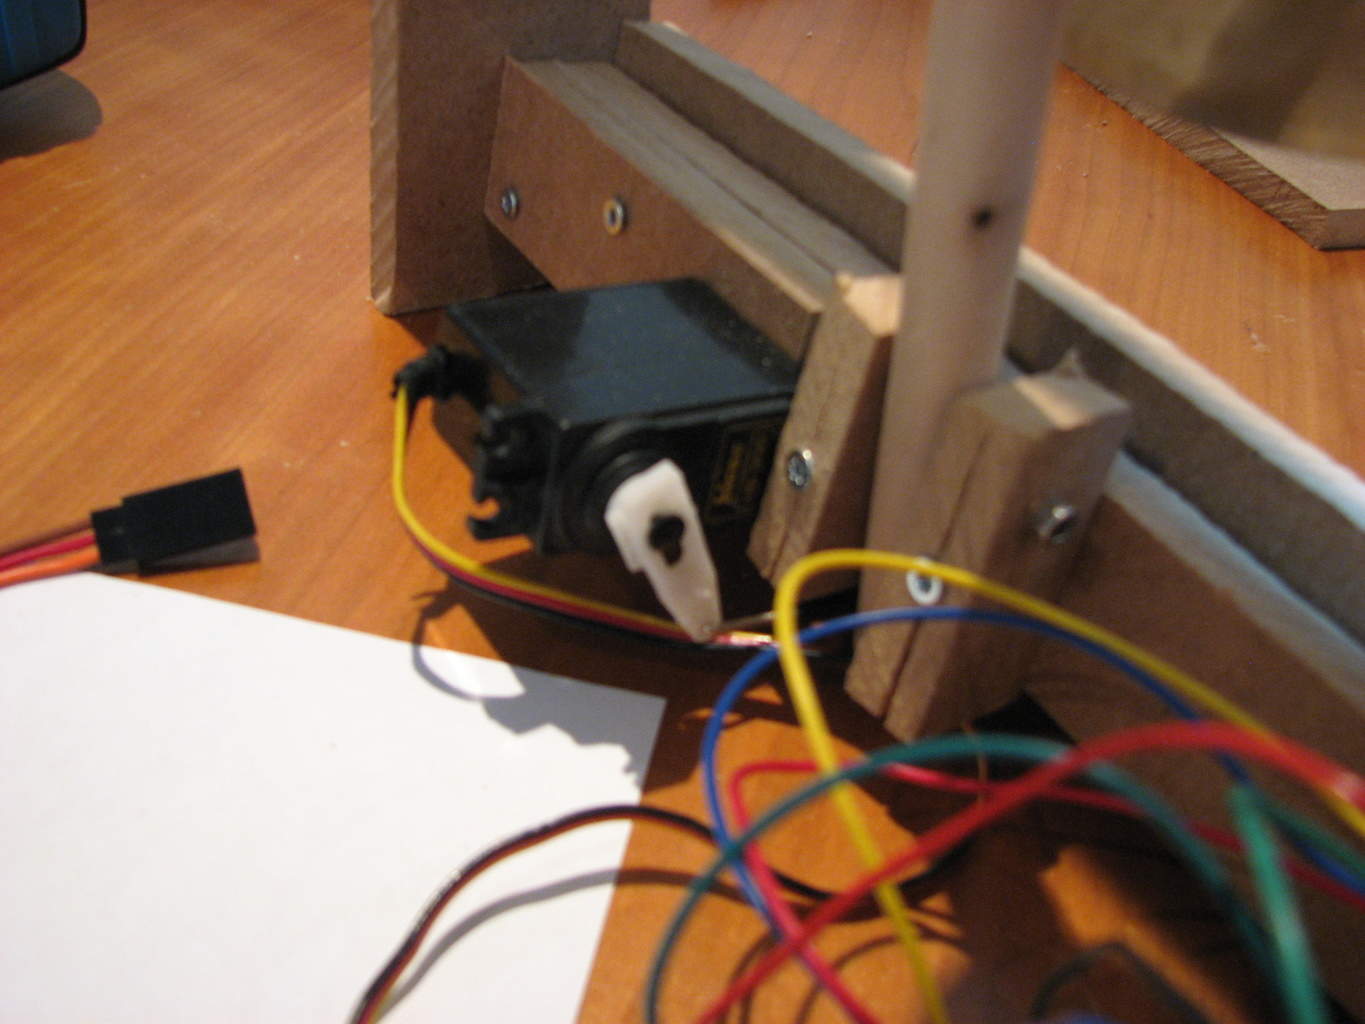
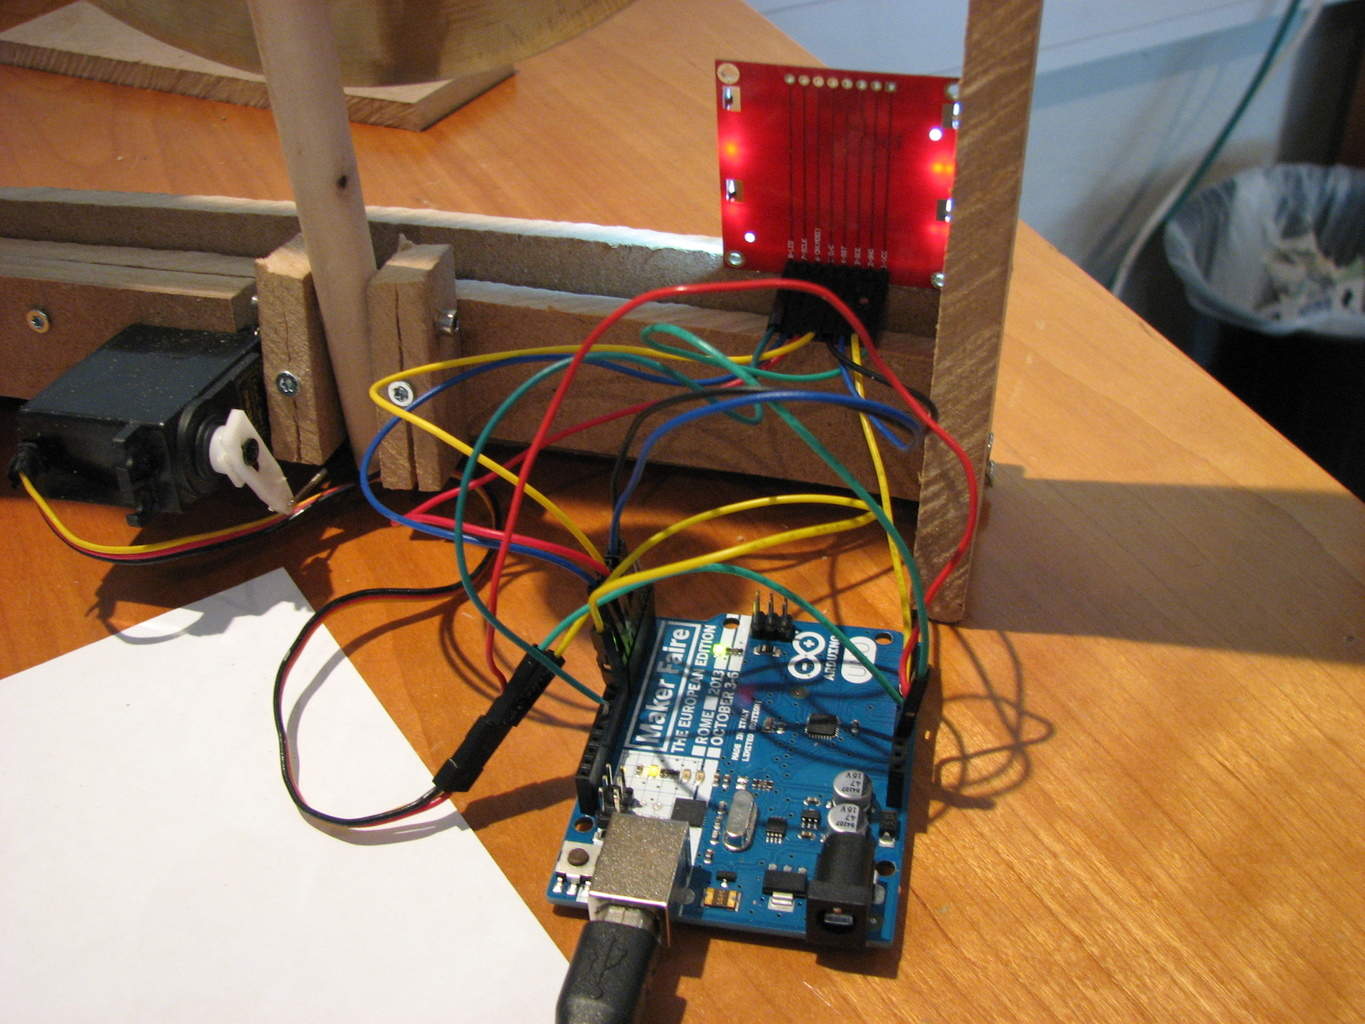
I wanted an indication of how much time there was left, so I needed some kind of display. Luckily I had a Nokia display with breakout board from Sparkfun which would work very well for this usage. I also had a small servo motor from an old RC helicopter that I could use to control the mallet.
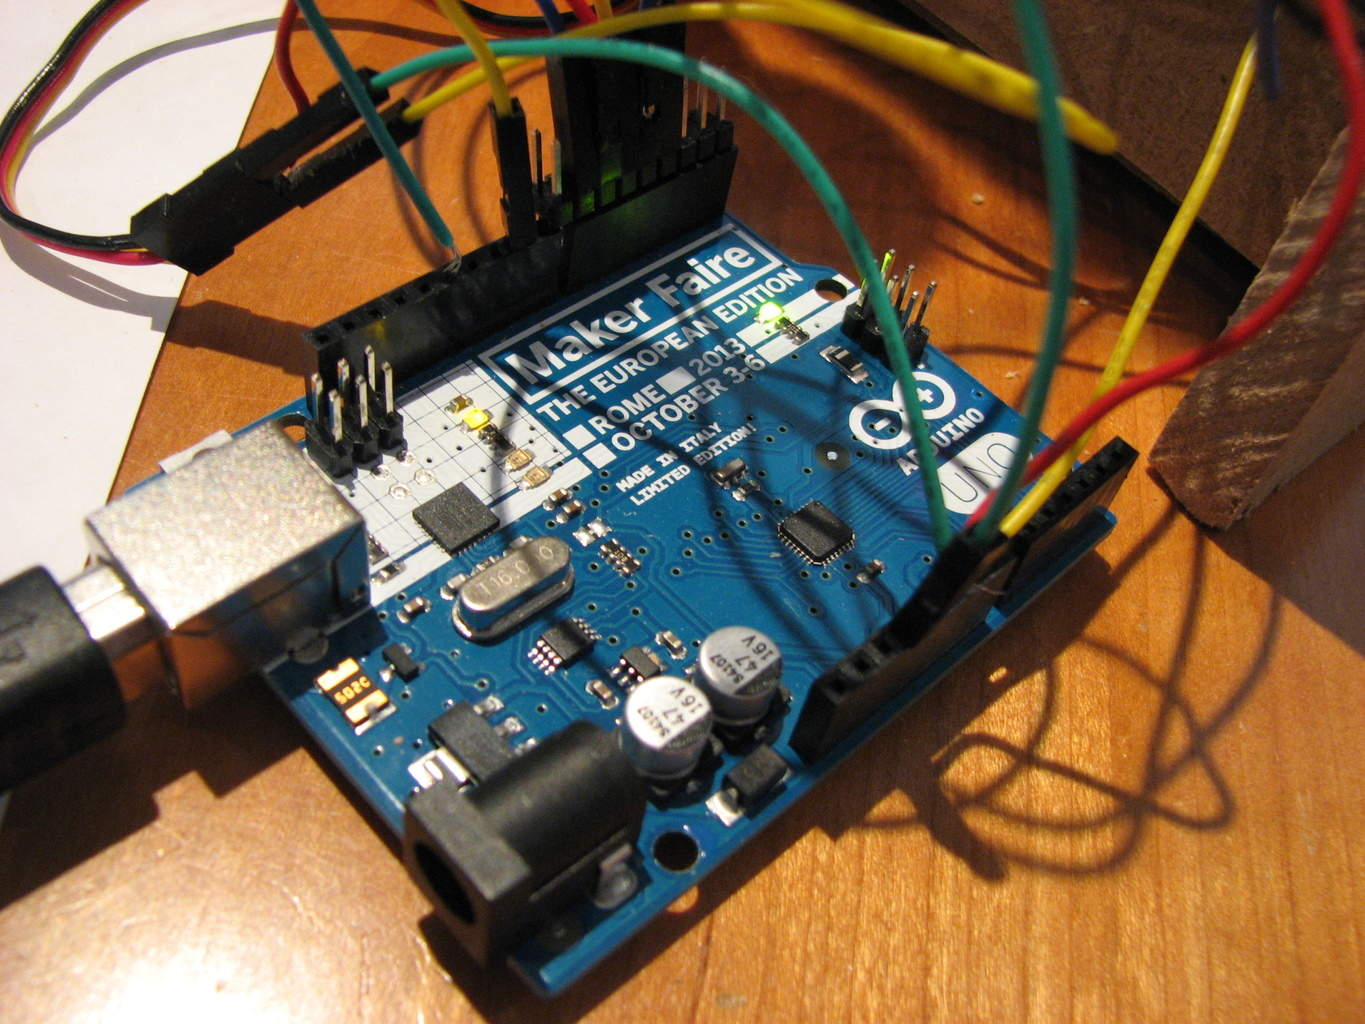
I decided to use an Arduino for my timer project because that makes controlling the display and servo motor really simple. And adding a timer is also really simple on an Arduino.
Components used:
–Arduino Uno (MakerFaire Rome edition)
-Servo from an old RC helicopter
-Gong and mallet (from Gongs Unlimited)
–Graphic LCD 84×48
Building the gong timer project
First of all, I needed a stand for the gong and the mallet.
I built a very simple prototype by cutting and assembling a chipboard. As you can see, it’s not much to brag about, but it holds the gong, the mallet and the servo in their places. (If I make a 2.0 version of this, I will probably get some laser cut parts instead)
Then I programmed the Arduino using libraries to simplify the code. I used Servo.h for controlling the servo. I used TimedAction.h for the timer functionality. And I used an Adafruit library to control the display.
I spent a lot of time creating the perfect “Gong!” -sound for my timer project. I had to make the servo turn just enough to hit the gong hard, but I also had to make sure it went back fast enough to let the “Gong!”-sound last.
<Download Gong Timer Code Here>
How it works
The timer will start a few seconds after the Arduino is powered on. It starts with a “gong”. Then after 25 minutes it “gongs” again and the timer stops. I reset the timer by pressing reset on the arduino.
I have a video of it, but I’m currently in Guatemala with limited internet bandwidth. I will upload once I am somewhere with some more bandwidth.
Return from Timer Project to Circuit Ideas
More Circuits & Projects Tutorials

10 Simple Steps to Learn Electronics
Electronics is easy when you know what to focus on and what to ignore. Learn what "the basics" really is and how to learn it fast.

Hello,
I am interested in building this, but is there a schematic somewhere or do I have to get it from another project?
Hey jp,
I don’t have schematics, but here is how to hook up the LCD: https://learn.sparkfun.com/tutorials/graphic-lcd-hookup-guide
And here is how to hook up and test a servo: http://arduino.cc/en/Tutorial/sweep
Hope this helps!
Oyvind
This is really cool, I’m making one this weekend. I’ll send an update.
Great =)
Oyvind